Merchant Take on Process - IYS
Merchant Take on Process - IYS
User Group Capture
Action: Log on to: iVeri Admin website, navigate to Merchant Profile > select Create
1. Capture all the details on the form.
2. Ensure that the Distributor (Which is iVeri) is set.
3.“Aggregator” option is used should a merchant belong to a listed Payment Aggregator, and this is because the merchant agreement is between the acquirer and the Aggregator. If “yes” assign the appropriate Aggregator from the drop down.
Note: If the merchant does not belong to an Aggregator, the Aggregator field must be left to “None”
Once details are populated, Click on Create.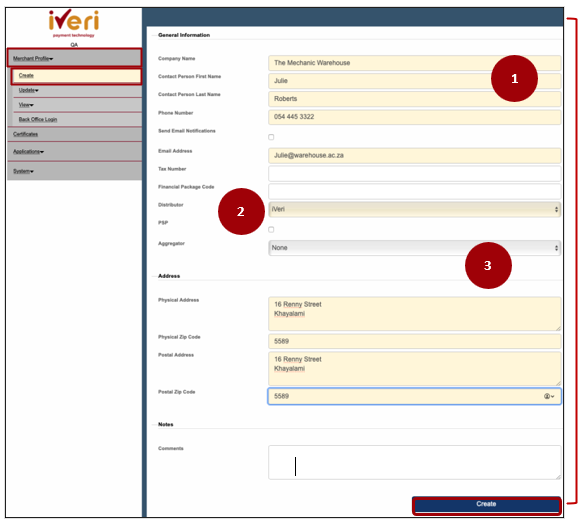
Important Note:
- This Association of an Integrator or Aggregator of a merchant is standard across all products, and across all Take-On Processes
- This will generate the iVeri Merchant Group ID Number which will be displayed on the screen, make note of it.
- The BackOffice Administrator password will automatically be sent to the contact persons’ email address as per the Merchant Capture Form
Applications - Create
Action: The system will automatically take you to this screen. Applications > Create
4.Complete the required fields on the form:
Under Application:
- The Yellow fields are mandatory.
- Ensure to Select the ProductType ID: e.g., IYS
- Technical email: use the merchants email address.
- Default Provider: as per the Acquirer/Or Partner
- Ensure you select the Provider block as per the form
- Select “Suspend Application if inactive” – if you want the merchant to be inactive should they not trade in 3 months, if not leave it blank.
- Select Email Notification – to receive email notifications on this Application.
- Description as per the Product
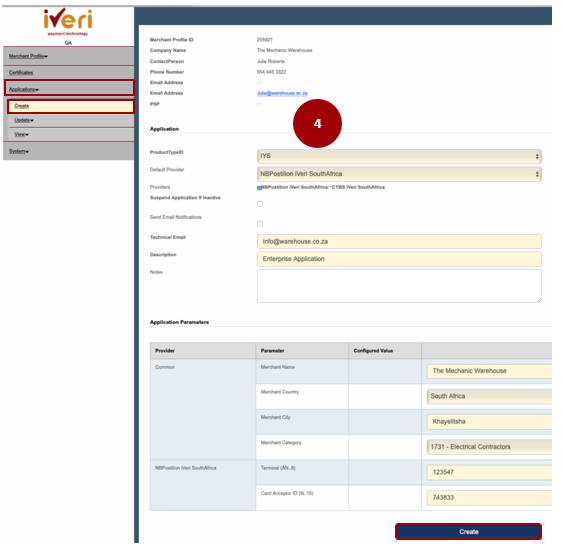
Under Application Parameters:
- Type the Name of the Merchant under “Merchant Name”
- Type the name of the city that the merchant operates under “Merchant City”
- Type the “Merchant Country”.
- Merchant Category - as per the merchant.
- Card Acceptor ID
Select ‘Create’ once done
Applications – Update – Back Office Services
The system will take you to BackOffice services creation.
How to Navigate to this screen:
Applications > Update >Back Office Services
This is where BackOffice Services are created for the merchant.
5. Select the Live Application ID
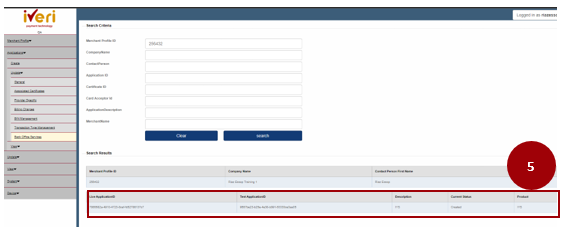
6.Select iVeri BackOffice under the local, Merchant Admin under the other local
7.Delta Cardinal Installation select IYS Cardinal
Select update once completed
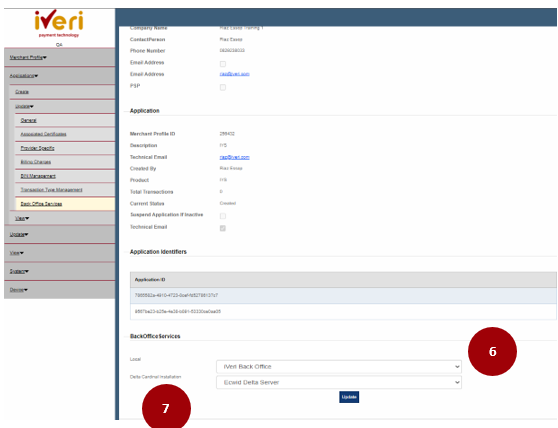
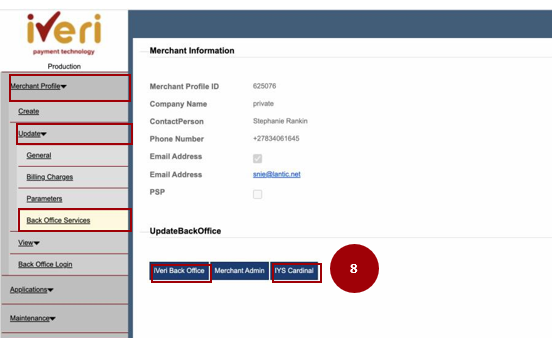
Update BackOffice Services
This screen will appear. How to Navigate:
Merchant Profile > Update> BackOffice Services
8.Select the “iVeri Back Office”, IYS Cardinal tab and the “Merchant Admin” tab to update and create the Backoffice services.
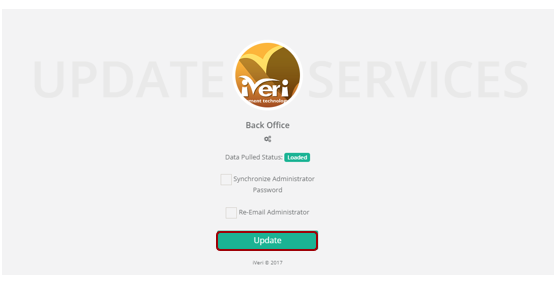
9. The Merchant page will populate automatically, then you would need to select Update.
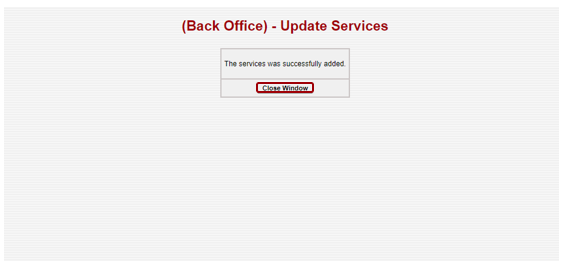
10. Once the services are successfully loaded, select Close Window.
Update - General
Action: Navigate to Update and select General
Adding an Integrator
1. If the merchant belongs to an Integrator, select “Add Integrator” choose the integrator on the drop down.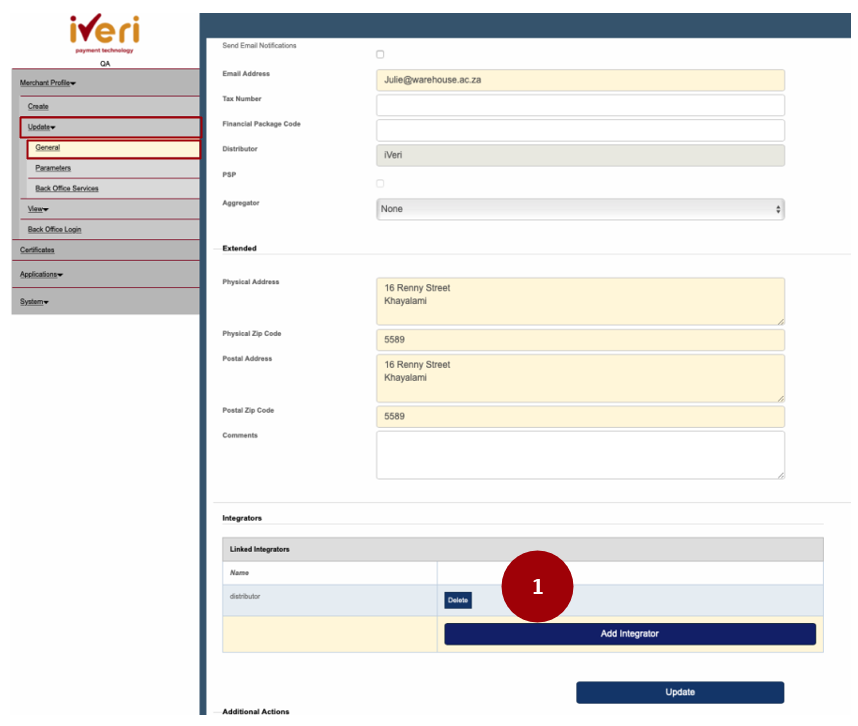
Important Note:
- If this is not a new merchant take on, there is no need to add an integrator as their existing integrators of those merchants have been migrated already.
- Should the Integrator or Aggregator not exist in the above listed Drop-down, this means they have not been loaded or screened by iVeri, this would require iVeri to conduct checks together with the bank to ensure this is done.
Applications – Update – Provider Specific
Action: Navigate to: Applications > Update > Provider Specific.
1. Enter the User Group ID and click on Search (as initially shown).
2. Click on the Live Application ID for IYS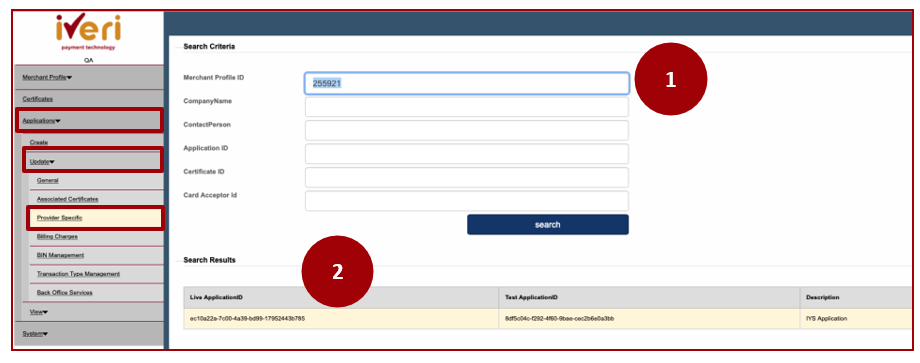
3. This screen will appear.
As you scroll down to the 7th item on the list, “Merchant Category” is required, this is done by selecting the correct merchant category the specific merchant belongs to.
Go through all the other fields to ensure that information is captured correctly
When completed, Click on update Parameters.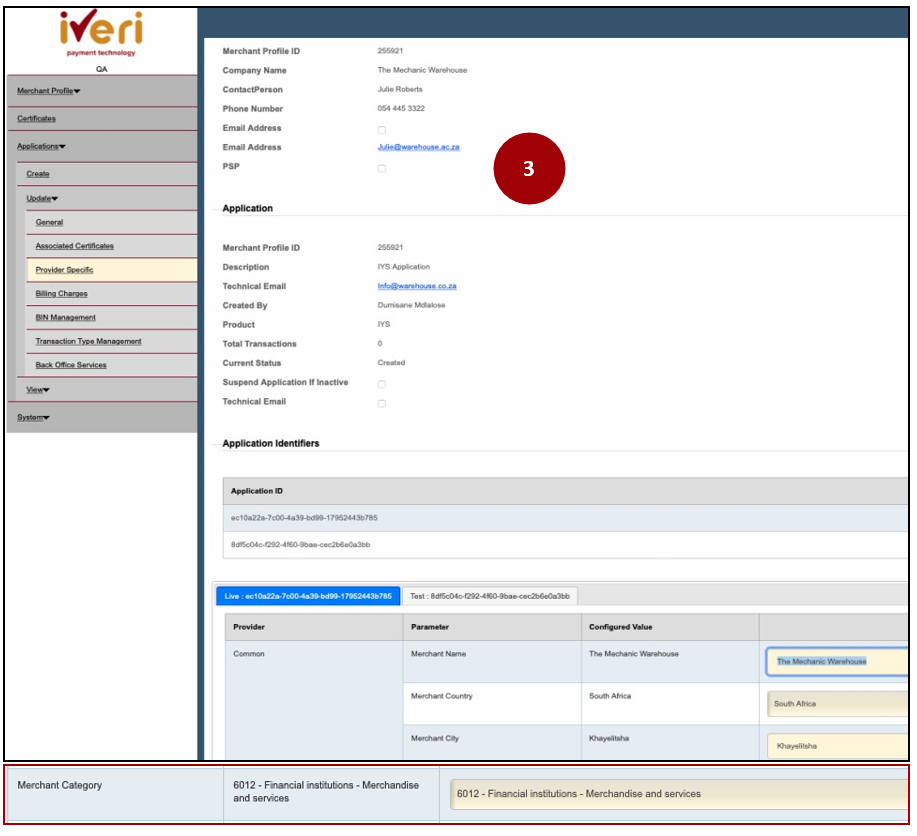
Please Note:
- Send your capture confirmation email to the merchant,
- Send the new Merchant ID to assist@iveri.com
3D Secure – BankServ Configuration
An additional requirement under Provider Specific, is the configuration of functions that are related to BankServ. These requirements however depend on the Merchant and whether 3D Secure is enabled.
Action: In the Same Menu: (i.e. Applications > Update > Provider Specific)
Select IYS as the product, should the Merchant have more than one product.
Should the merchant be doing [BankServ] 3D Secure, change the following:
3DS Secure Enabled: is Yes
3D Secure Risk Level, select “3DSecureAttempted or 3DSecure (participating associations”
Populate 3D Secure Provider, change the default to BankServ
Populate 3D Secure MasterCard Merchant ID, (insert the merchant Number)
Populate 3D Secure VISA Card Merchant ID,(insert the merchant Number)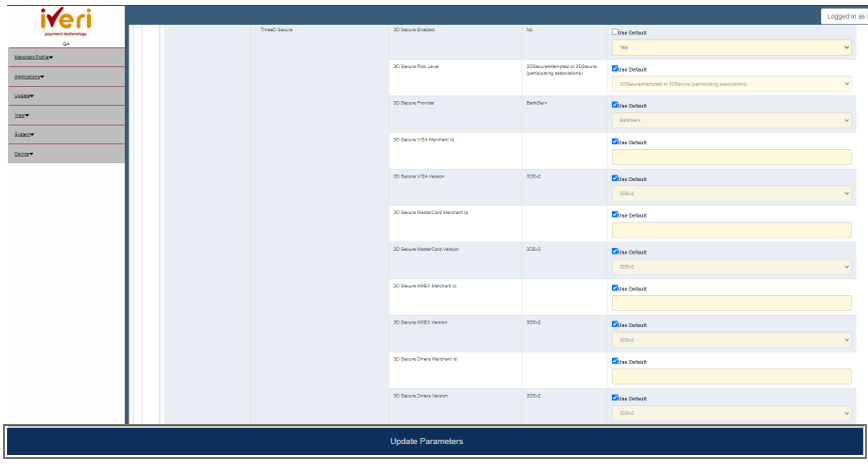
Important Note:
- If the Merchant is enabled for 3DS but is using either “Cyber Source”, “BankServ or “Netcetera” please ensure that under “3DSecure Risk Level” you select “3DSecureAttempted or 3DSecure (participating associations)”
- Ensure a BackOffice Service Update is also done.