DiVert BackOffice User Guide
This document details the functionality available in Backoffice for DiVert merchants. The merchant interface (URL) to be accessed depends on the acquirer in which the merchant has an agreement with.
Core Functions in Backoffice
The merchant portal Backoffice allows for the following core functions
- Management of User
- Creation of users
- Transaction Types allowed per user created
- Backoffice functionality views allowed
- Applications permitted on a user created
- Transaction Reports & Listing & Lookups
- Recon Reports
- Blacklisting of cards
- Customise payment request page with Merchant’s Corporate Identity.
- Create Transaction Requests
- Process Subsequent Transactions (Refunds)
Merchant Interface Functionality
Login
Purpose - To log in to the secure BackOffice Website, login credentials are emailed to the merchant during taken on process by the acquirer.

Action:
- User Group - enter your Billing Details ID
- User Name - type in Administrator
- Password - this is the Administrator password sent to you with the Billing Details ID by email. Copy and paste it from the email.
Welcome Page
Purpose - Reflects who is logged in and provides the menu options which the logged in user is able to access or use.

User Manager
Manger the user on your back office
Edit User
Edit – General details
Purpose - To edit/change any of the user information previously captured, or to suspend a user from having access to BackOffice
Action:
Hover over the users’ profile and select on the user’s icon. 
Select the Edit button

Make the changes on the Users profile and click Save Changes to action the change.

Please Note:
To change Password of the user to a new one, select either Change Password or reset Password
You can make changes to the Users existing profile. To suspend / disable an users access to BackOffice, navigate to the ‘Enabled’ tab and click on the Radio button. This will suspend / disable the users access. Click on the Save Changes to action the changes.
Add User
Purpose - To add/capture the details for a new user

Action:
Hover over to Users. The following screen will appear.
Select “Add New User” Fill in all the mandatory fields (marked [*]) and click on “Save changes”. A resultant message will be displayed.

Reset Password
Should a user have forgot their login password to BackOffice, navigate to the ‘Forgot your password?’ link.

The system will request you to enter your User Group / Merchant Profile ID and Username.

Once the user clicks on submit, a notification will appear that the user will receive an e-mail notification. The e-mail notification will contain a link that the user will access to change their password.

Now that the user has clicked on the link, they will be redirected to the BackOffice Reset Password page. Enter and confirm the new password. Lastly to action the new password change, click on Reset Password tab.

The following notification will appear on a successful password change.

Service Parameters
Purpose - To allocate the functions within BackOffice in which you (the Administrator) want to allow the new user to have or not have access to

Action:
Select Users, select a particular user, and then select Service Parameters, based on the products used by the merchant choose Yes or No to a particular access rights and limits.
Save Changes once done.
Service Functions
Purpose – Based on the functions that the user has been granted on a particular product these parameters determine the functions to be made available pertaining to the product access a user has.
Action:
Tick on the relevant functions a user is enabled to perform within Backoffice for a particular product.
Save Changes once completed.
Application Parameters
Purpose – This function is used to allocate application ID(s) that a User is only allowed to have access to. This application refers to specific product and what a merchant uses to process transactions through iVeri.
Example below indicates that when you select a particular Application ID an Administrator can configure what functions can this user perform in a particular Application ID. If no function is associated to an Application ID, no access is granted to that user.
Administrator can configure what Transaction Types a user can perform on a specific Application ID.
If no Transaction Types are configured for a user, the user will be unable to process transactions for any of the Application IDs.
Action:
Select the product and Live Application IDs you as an Administrator would like a user to access and configure per product, the Transaction types a user can access by ticking the applicable box under Transaction Types.
Save Changes once complete.
Administrator Password Reset
Purpose – This is used when an Administrator would like to reset their existing password.
Action:
From the menu, select the Administrator area and choose the option to change password.
It is recommended that you use Alphanumeric and Special characters to ensure the password strength meter indicates a strong password.
Save Changes once completed

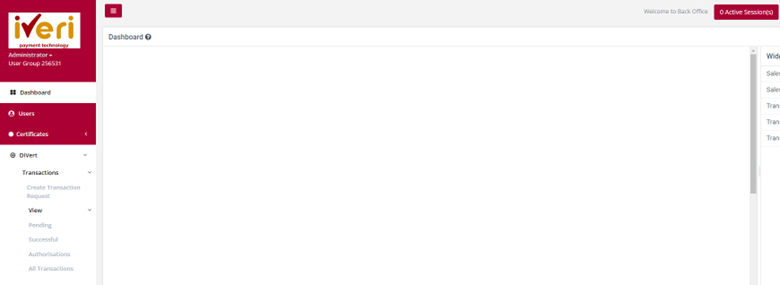
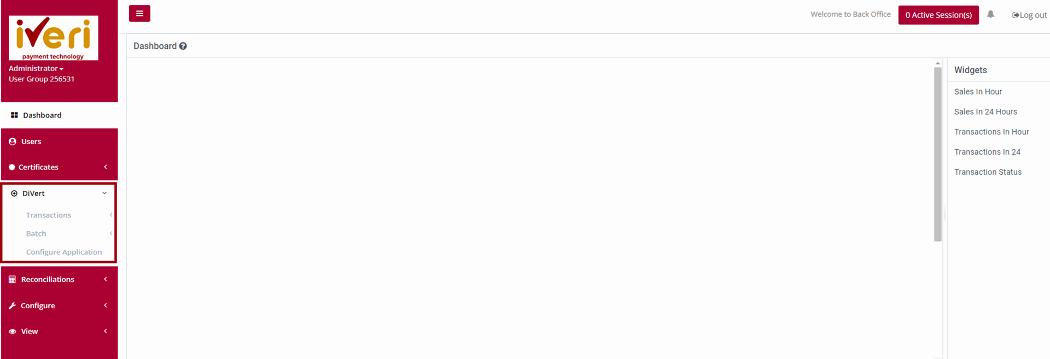
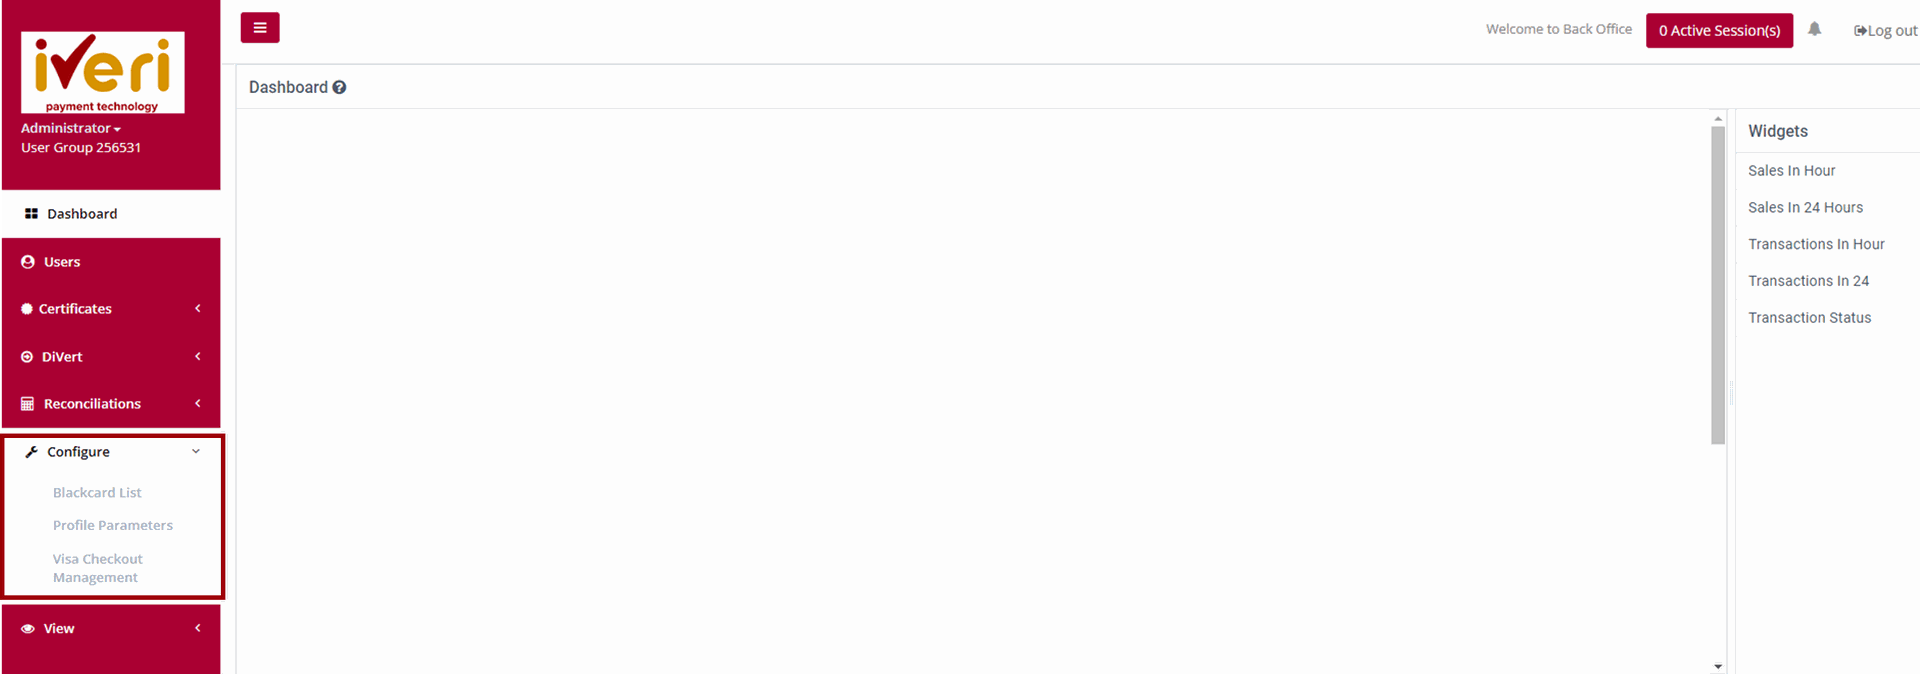
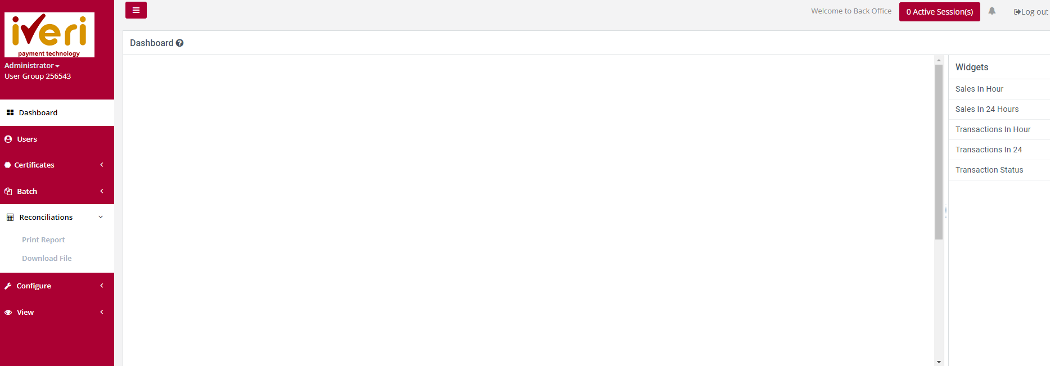
Dashboard
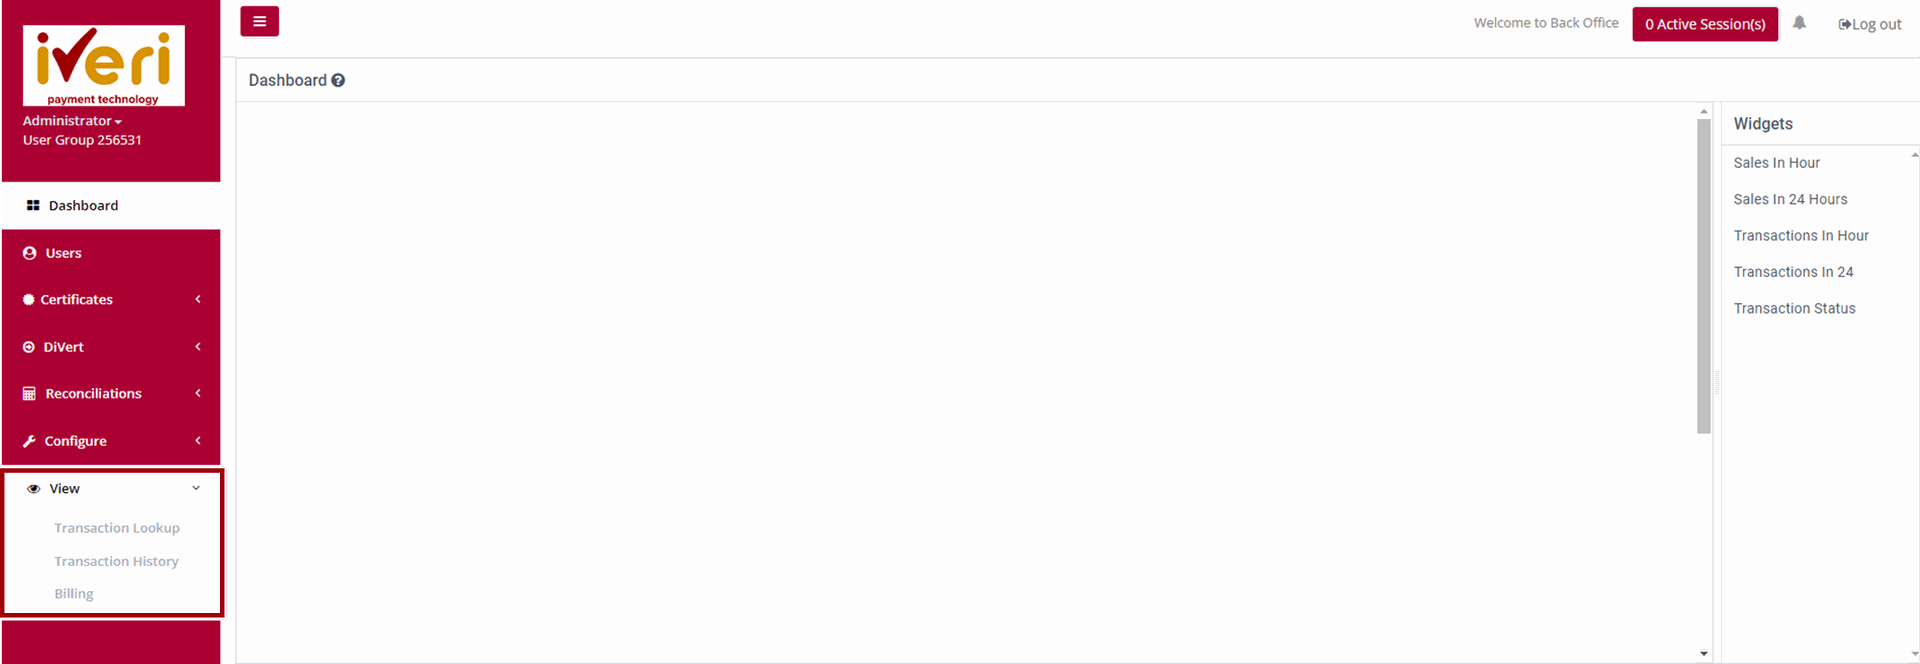
Purpose – The dashboard provides the Merchant with a summary or snapshot of Sales, Transactions and Transaction statuses within a set period of time. Depending on the needs of the Merchant, the dashboard is customisable by dragging and dropping the relevant widgets on the dashboard.
The dashboard offers merchants a comprehensive overview of their sales, transactions, and transaction statuses within a specified time frame. It serves as a realtime snapshot of business performance, enabling merchants to quickly assess key metrics and trends.
To cater to different business needs, the dashboard is fully customizable. Merchants can drag and drop various widgets to tailor the layout, ensuring that the most relevant data is easily accessible. This flexibility allows merchants to focus on the insights that matter most to their operations, such as daily sales trends,payment success rates, or transaction volume breakdowns.

How to customise your dashboard:
From the widgets menu, merchants can select and drag their preferred widgets onto the dashboard, allowing them to customize their view based on their specific business needs.
DiVert
DiVert is an instant remote payment solution for Merchants processing Card Not Present transaction requests to cardholders that utilise their services.
How does DiVert work?
A client receives an e-mail request with a link. When clicked, the client is redirected to a secure payment page where a payment is made.
Transactions
Create Transaction Request
Purpose - This function allows you to create a request for payment to be sent to cardholder
Action:
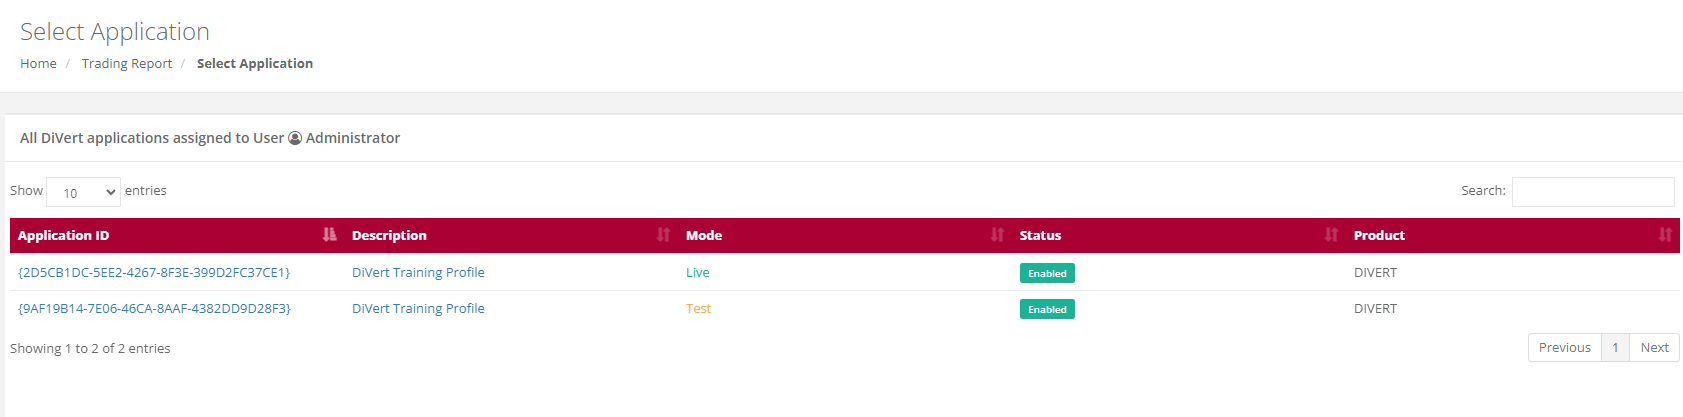
On the main menu bar, select the DiVert menu, Select Transactions and click on Create Transaction Request. 
Action:
Select the relevant Application ID. A Capture Transaction screen will be displayed
Purpose - This function allows you to create a request for payment to be sent to cardholder
Action:
On the main menu bar, select the DiVert menu, Select Transactions and click on Create Transaction Request. ![]()
Action:
Select the relevant Application ID. A Capture Transaction screen will be displayed
![]()
Action:
Complete the details on the capture page and click Submit. A resultant page will then be displayed.
![]()
Once completed the Submit button is selected and the below Pop up screen will be displayed.
![]()
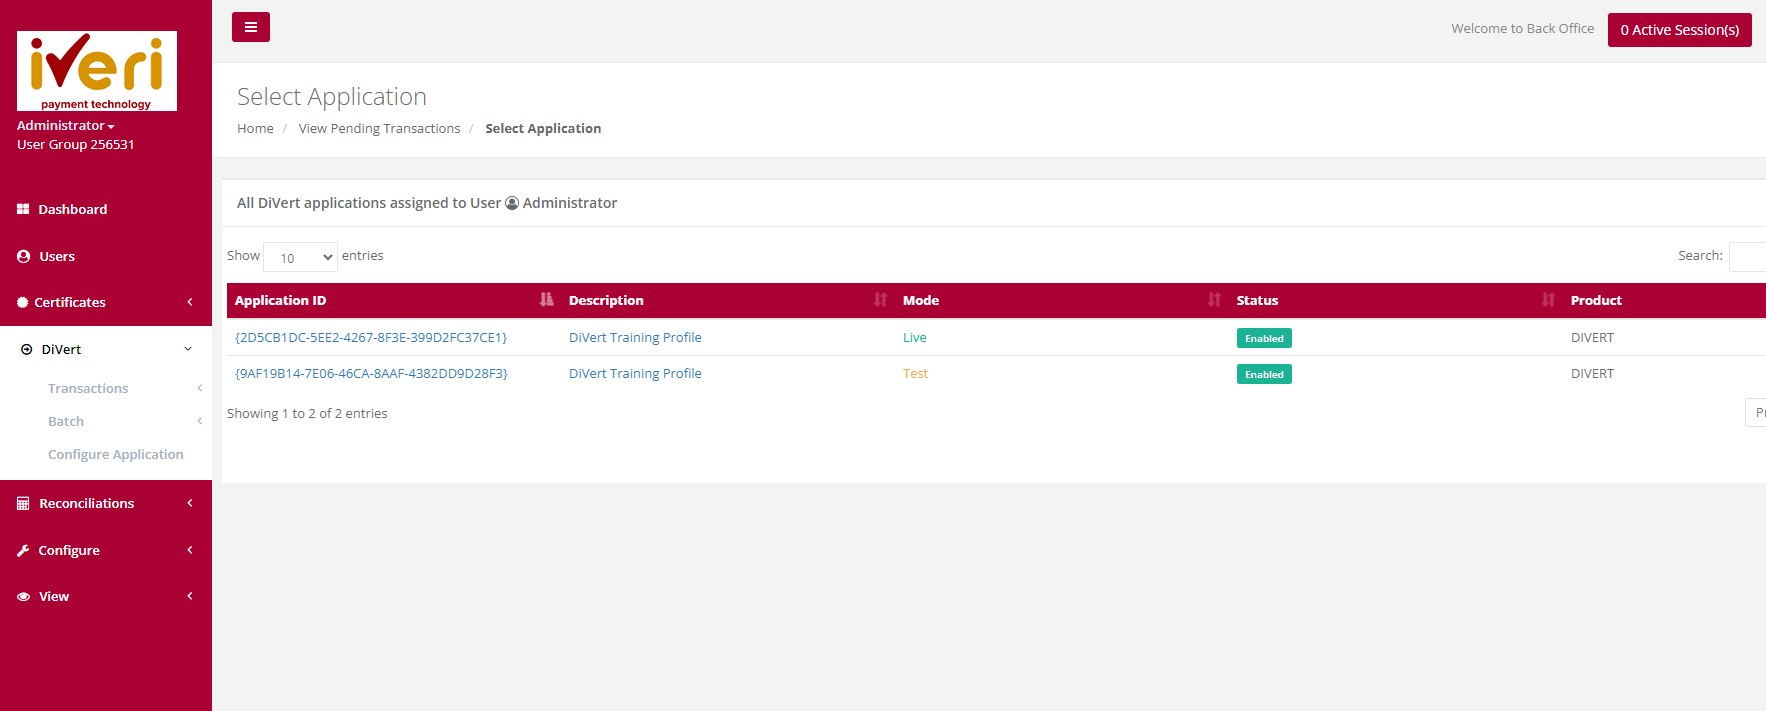
View – Pending
Purpose - view the list of Pending transactions for a selected Date or Period in order to check these against your confirmation emails or to view ALL details related to individual transactions.
Pending Transactions may result, where a transaction request was created, but payment has not yet been actioned by the cardholder.
The user is able to view pending transactions as a means to follow up with a cardholder.
Action:
In the menu bar, select DiVert, View, and then select Pending.
Choose an Application ID
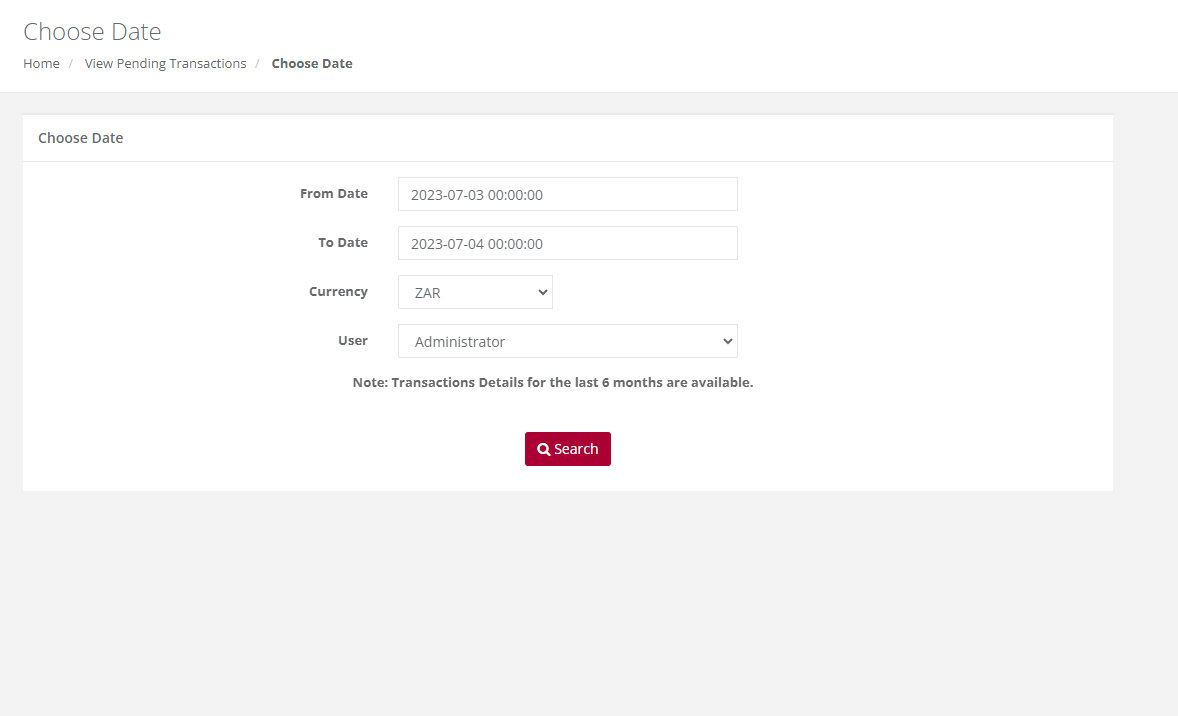
Choose a Date Criteria and select Search

Action:
Click on Cancel to delete the transaction or Edit to change the cardholder email address.
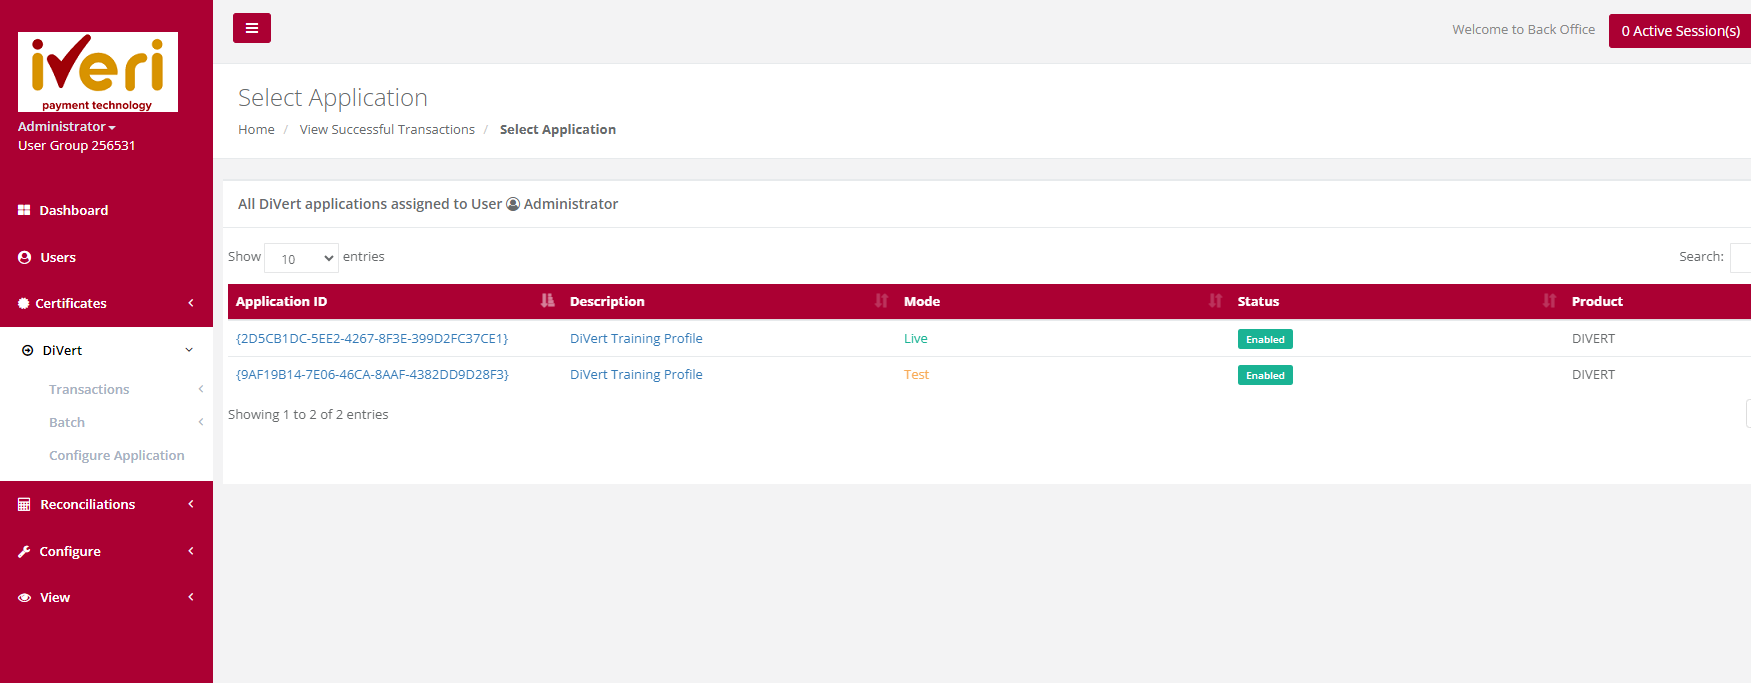
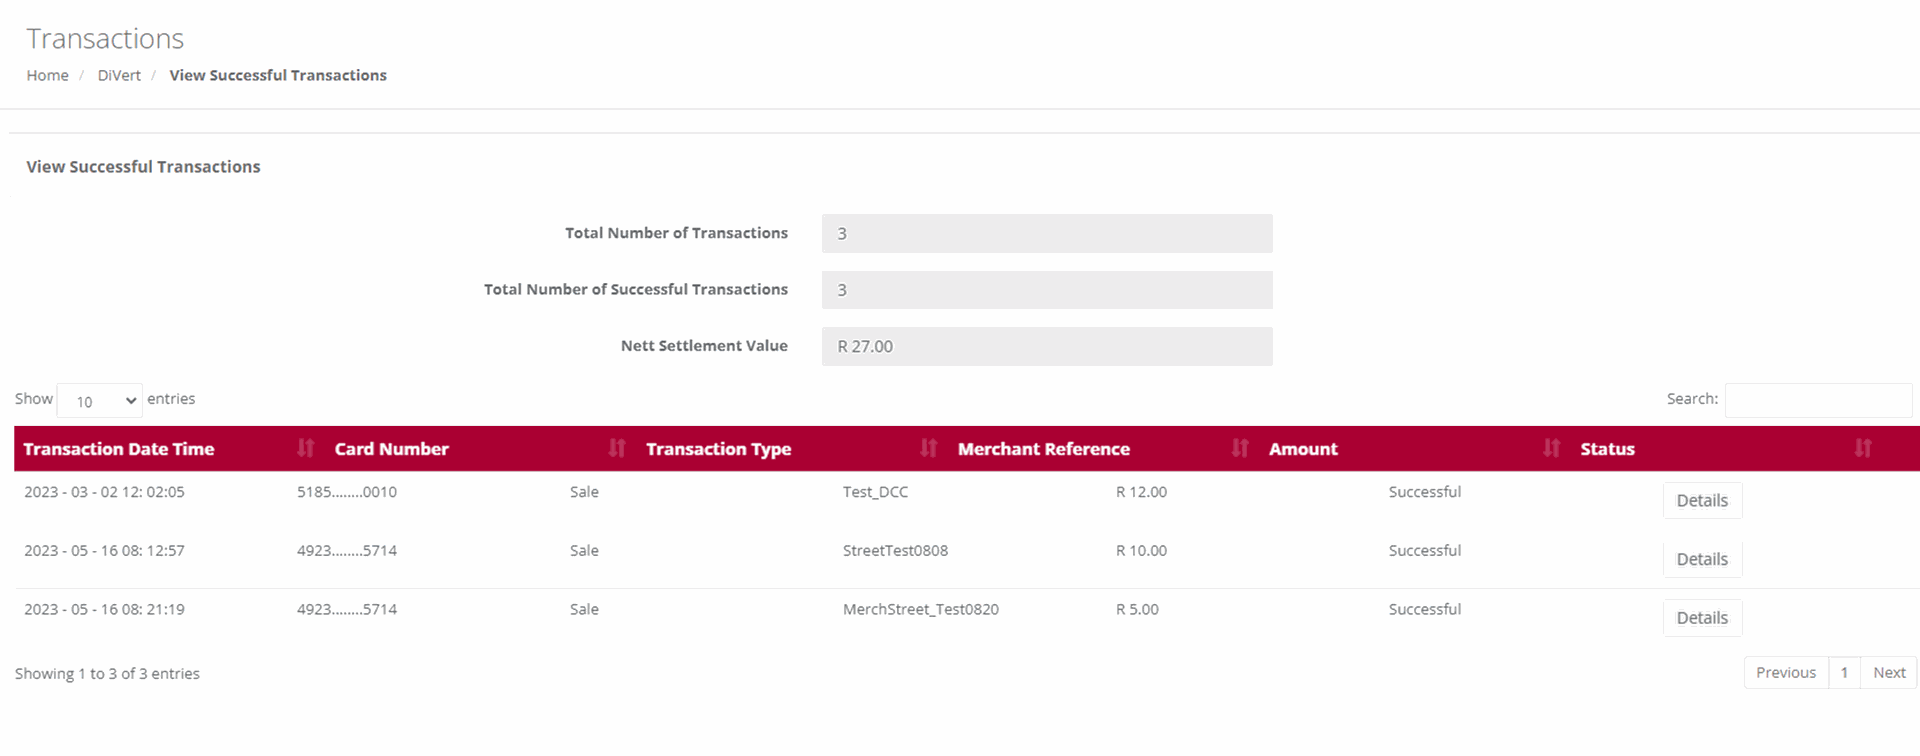
View - Successful
Purpose - To view the list of Successful Transactions’ for a selected Date or Period in order to check these against your confirmation emails or to view ALL details related to individual transactions.
Action:
In the menu bar, Select DiVert, Transactions, View Successful. Click on the Application ID you wish to view Successful Orders for. Select the Date or Date range and click on Search. This will bring up the following pages for viewing.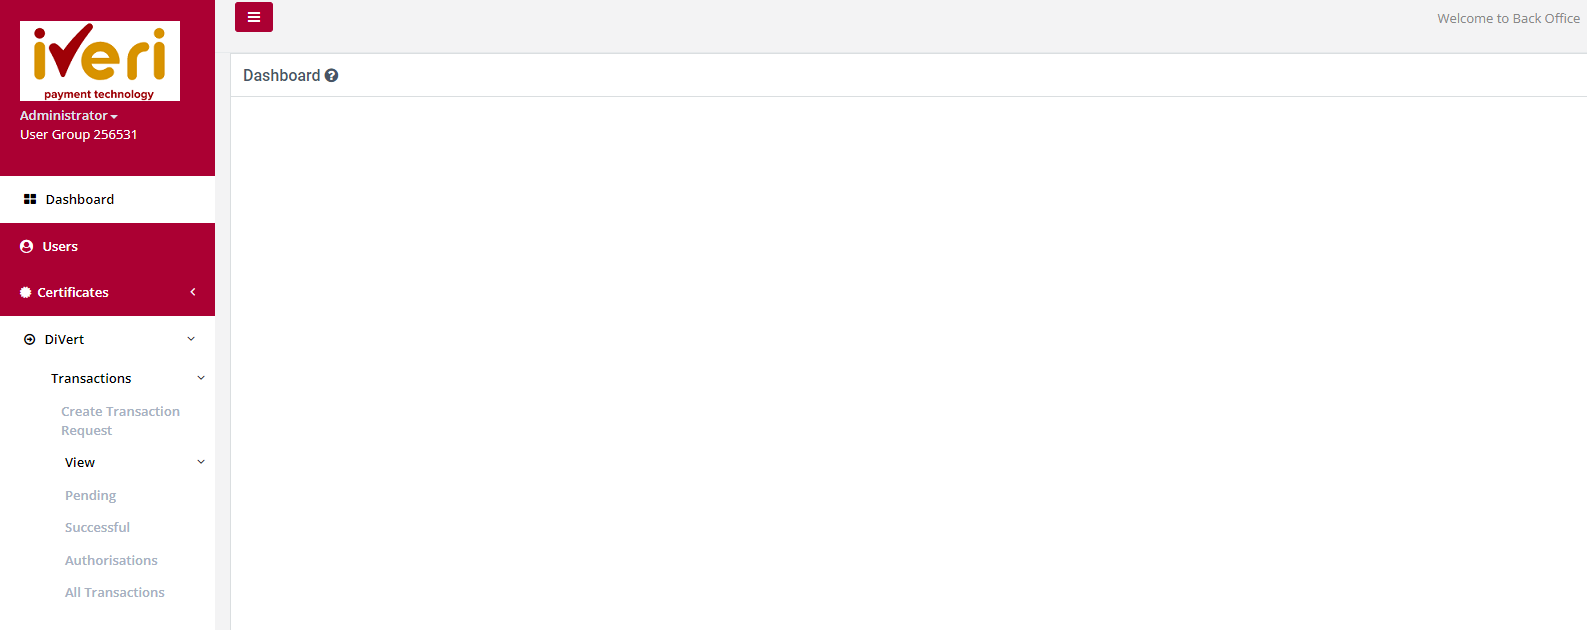
Choose a date and select Search
The Administrator or users who have been granted the necessary access will be able to view all successful transactions for ALL users.

Action:
If a user wants to view the details (above) of the transaction, edit is selected to see more information pertaining the transactions

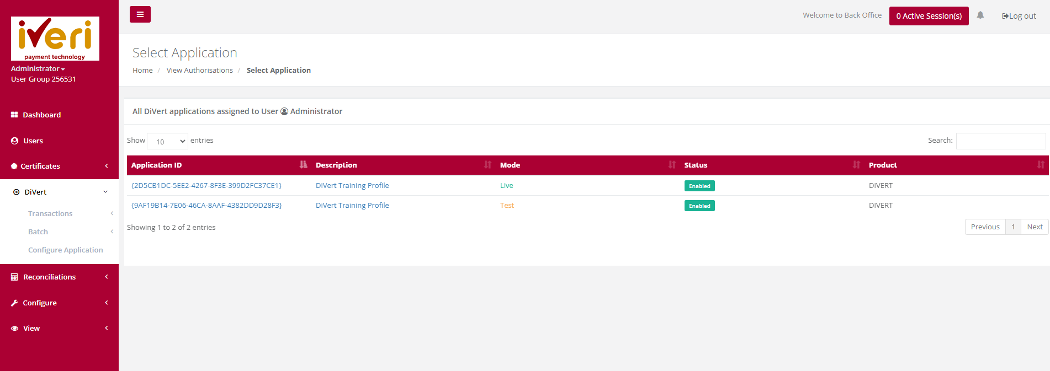
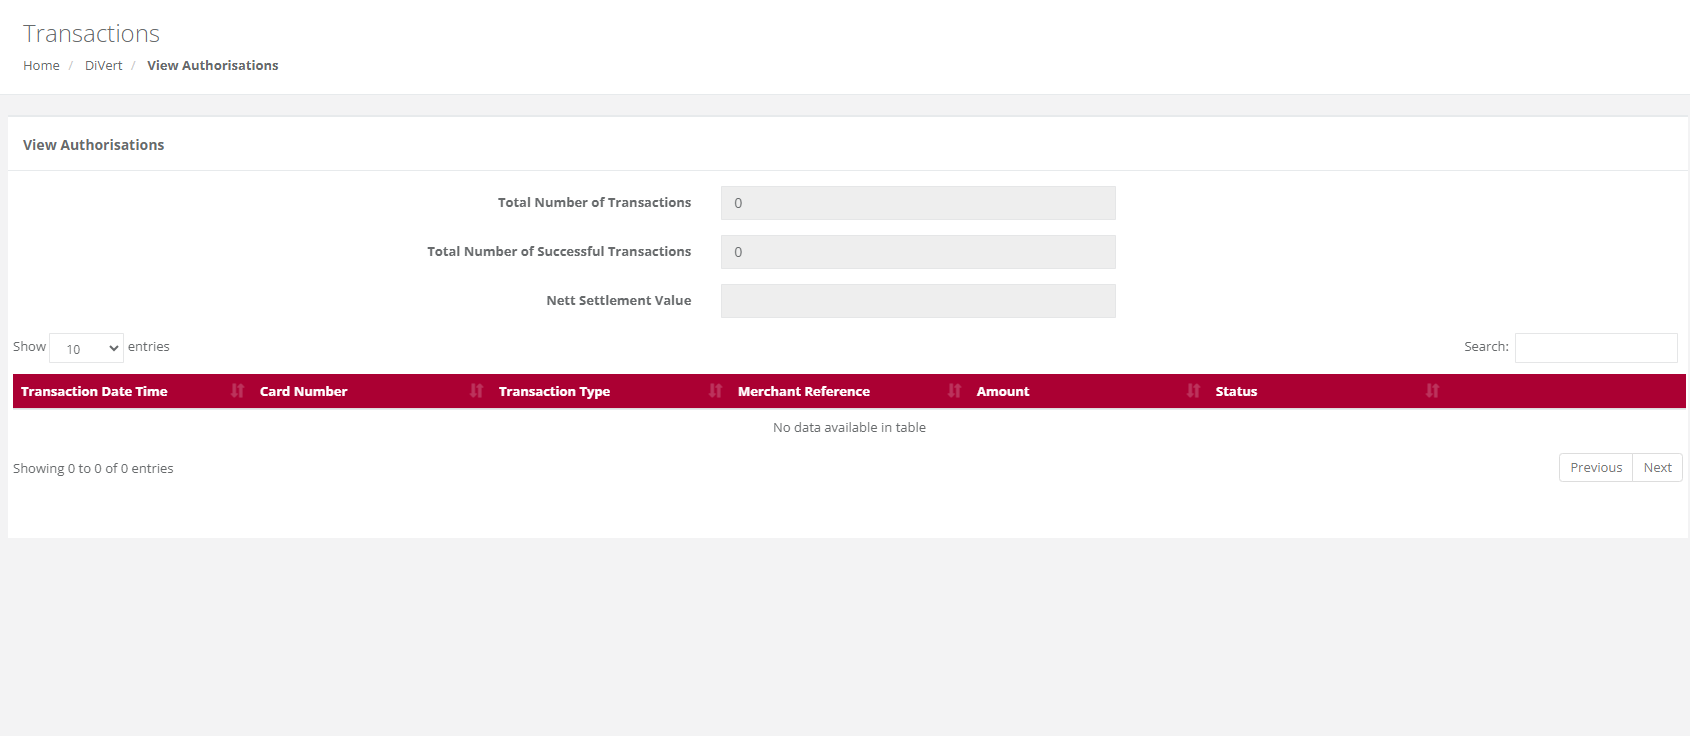
View – Authorisations
Purpose - To view the transactions for which you originally only obtained an Authorisation. This allows you to now use that Authorisation code to Debit the cardholder by doing a Subsequent Transaction to debit the cardholder and obtain the money in your bank account.
Action:
In the menu bar, Select DiVert, Transactions, View Authorisation. Click on the Application ID you wish to view Authorisations. Select the Date or Date range and click on Search. A list of transactions will be displayed
Choose a date and select Search

View – All Transactions
Purpose - To view a list of all transactions performed for a selected Date or Period.
Action:
In the menu bar, select DiVert, Transactions, View All Transactions. Click on the Application ID you wish to view Transactions. This will bring up the list of ALL transactions performed for your selection.
![]()
![]()
![]()
![]()
Subsequent Transaction
Purpose - Subsequent transactions allows a user with the correct permissions to further action a transaction that has been successfully processed. You can change the transaction type to Authorisation to a Sale or a Sale to a Refund.
![]()
Action:
Click on the appropriate Application ID in which you can view transactions that have been processed. Once the transactions details are displayed you, perform refunds, or do a debit![]()
Action:
Select the Date on which the original transaction took place from the drop down menu or select a period if you are not sure of the exact date and click on Search. This will bring up a summary list of all the transactions which match your search selection.
![]()
Action:
Scroll through the summary list until you find the transaction you want to take the action on. To make sure that it is the correct transaction, click on the Details button on the right to bring up the full details of the transaction.
![]()
![]()
Once edit is selected click on submit to continue the refund on the particular transaction. As you can see the transaction automatically goes to refund.
If this was an Authorisation transaction, under transaction type, you could also use this subsequent transaction option to authorize (Bank) the Authorized transaction by selecting Authorize Sale under Transaction Type
Report – DiVert Trading
Purpose - To view a list of all transactions performed for a selected Date or Period.
Action:
In the menu bar, select DiVert, Transactions, View All Authorisation. Click on the Application ID you wish to view Transactions. This will bring up the list of ALL transactions performed for your selection.
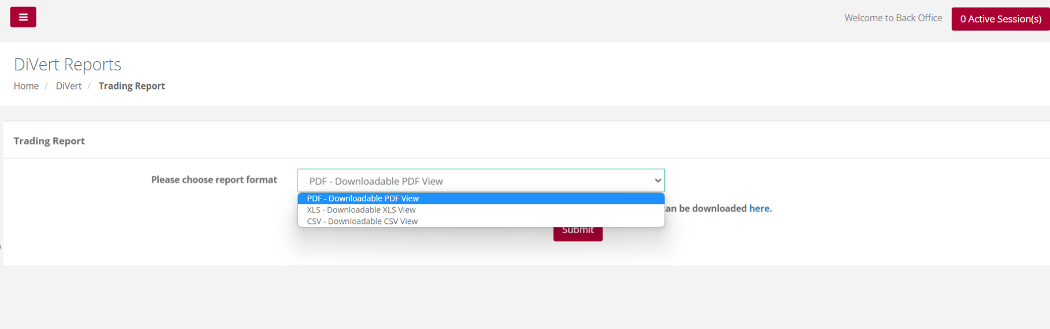
Purpose - To print a report of processed transactions on a specific Application ID.
Action:
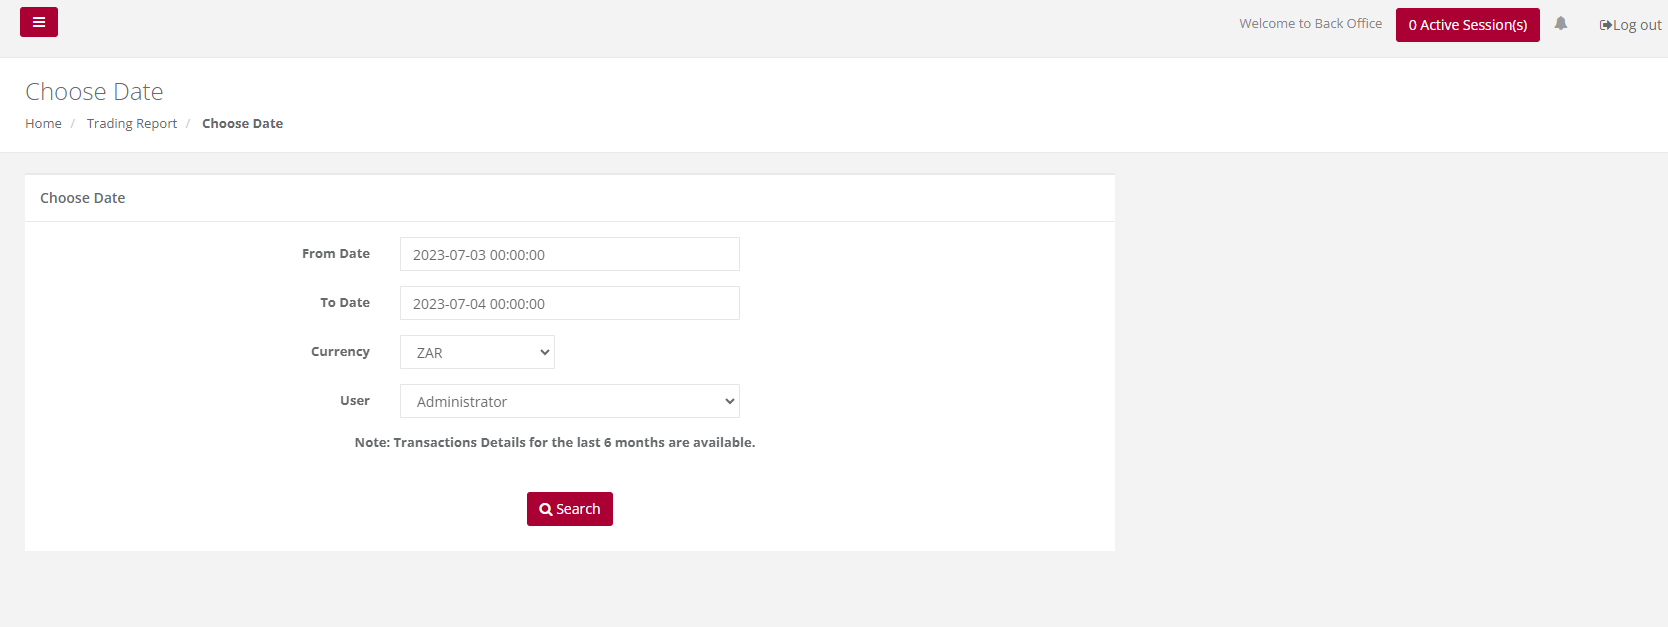
In the menu bar, select DiVert, Transactions, Reports, DiVert Trading Click on the Application ID you wish to view Transactions. This will bring up the list of ALL transactions performed for your selection.

Choose a date and from the user tab, please select from the dropdown ‘All’. This will ensure that the report extracted will include all users who have created transactions.
Choose the applicable form to download the Trading’ report on a particular Application ID
Divert- Batch-View Batch
Purpose: Merchants can view all Divert Batch files that have been uploaded
Action:
On the main menu go to Divert-Batch- View Batch

Action:
Click on the relevant Application ID used on the Divert Batch file

Action:
Select the date range and click Search. All the Batch Uploaded will be displays with the status (errors, or successfully uploaded or processed message), it will indicate the progress that the Divert batch file has made.

Batch – Download File
Purpose - Used by merchants upload the Result file of the Divert Batch uploaded in 5.8. The result file can be downloaded either by application ID or by File name.
Download By application ID
Action:
On the main menu go to DiVert – Batch – Download File – By Application. Click on the Application ID (test or live) used during the creation of the Divert batch file


Action:
Select the Date period in which the file was uploaded in, Click “Search”

Action:
A list of Result files by Application ID will be will displayed, click on “Download” on the relevant file.
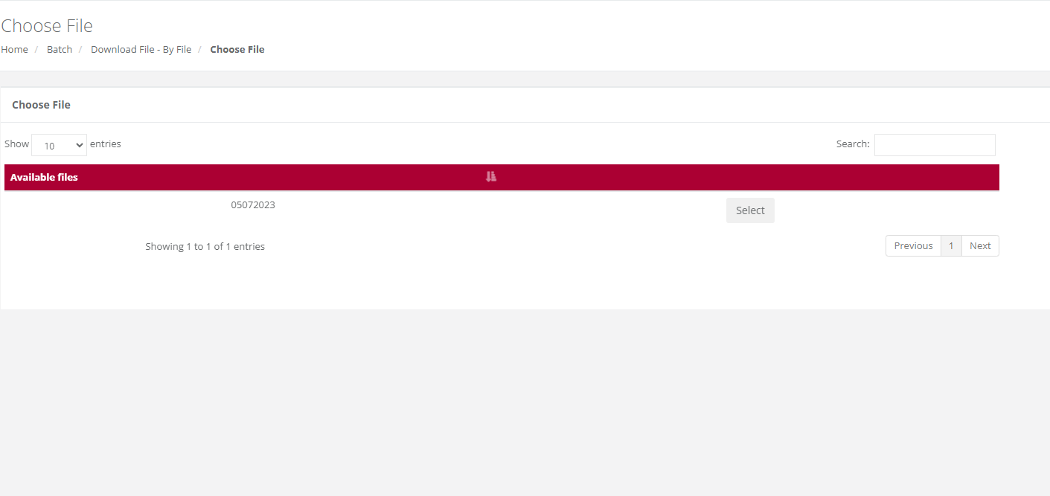
Download by File
Action:
On the main menu go to DiVert – Batch – Download File – By File

Action:
Select the Date range, click “Search”; Click on the File name, the file will start downloading

Divert – Batch- Upload File
Purpose - Used by merchants to upload Divert Batch payment requests to be sent to cardholders. An XML file based specification on how to create Divert Batch can be downloaded from http://forum.iveri.com.
Action:
On the main menu go to DiVert – Batch – Upload File

Action:
Click on Choose File to select the file saved on your directory to be uploaded and Click Submit.

This is the message indicate that the file is uploaded.

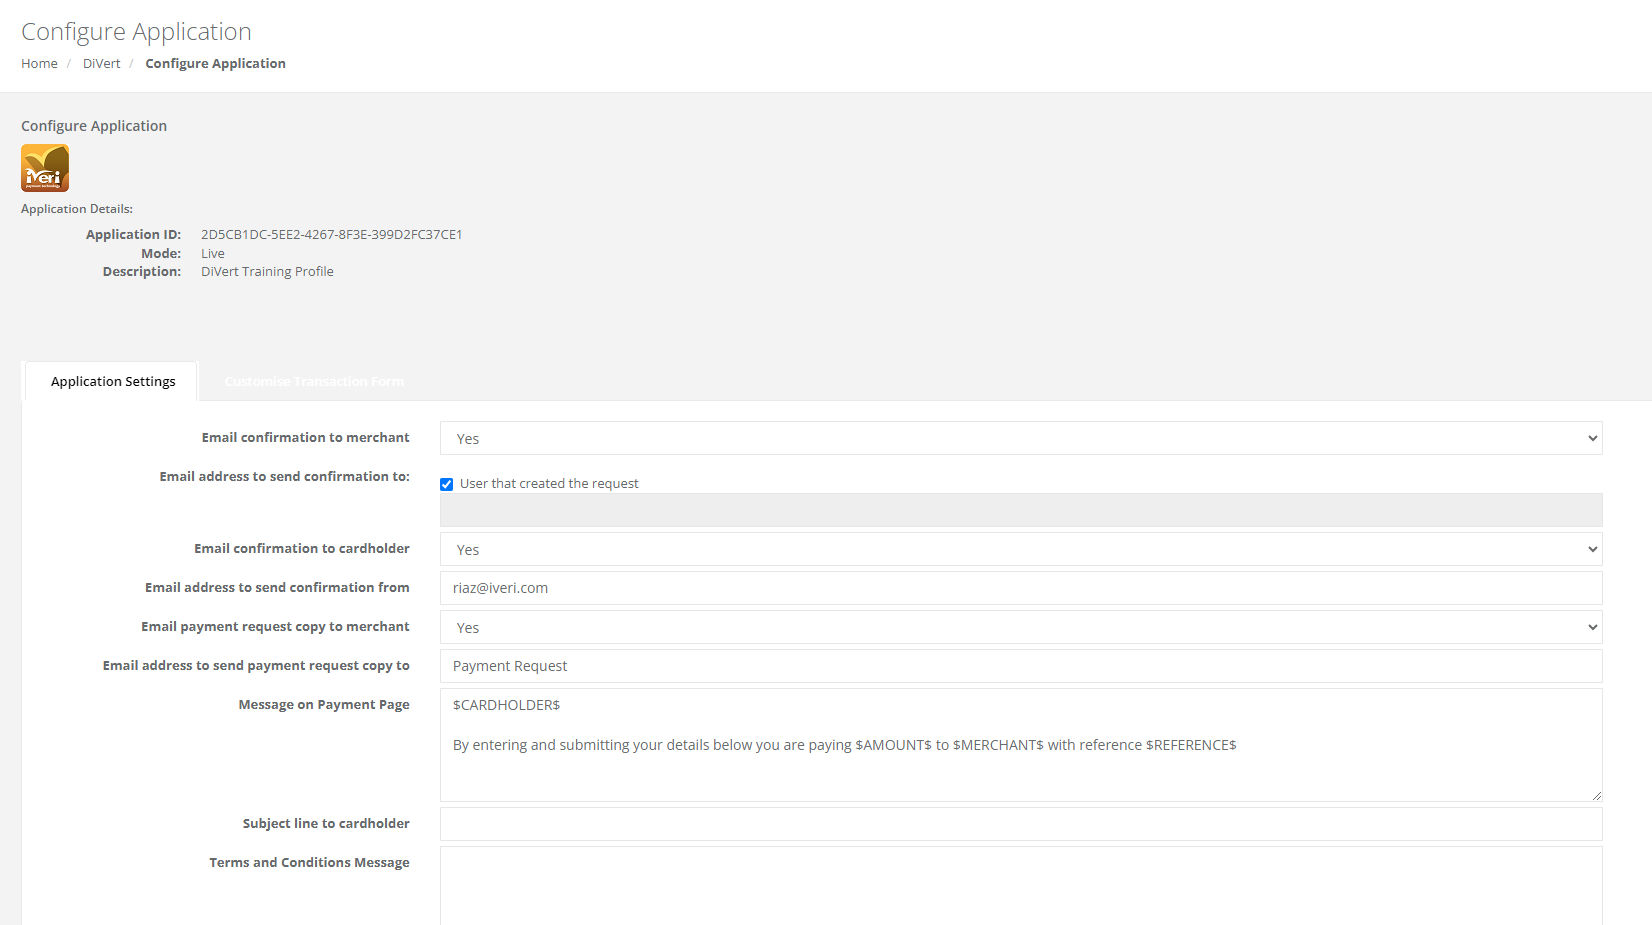
Configure Application
Purpose - Configuring your application is important. Configuring your application needs to take place before a user is able to create a transaction request. The user would need to configure:
- If E-mail confirmations can be sent to a cardholder.
- Confirm the E-mail address confirmations are sent to and from.
- Receive a copy of the payment request that has been sent to the cardholder.
- Customise the message on payment page.
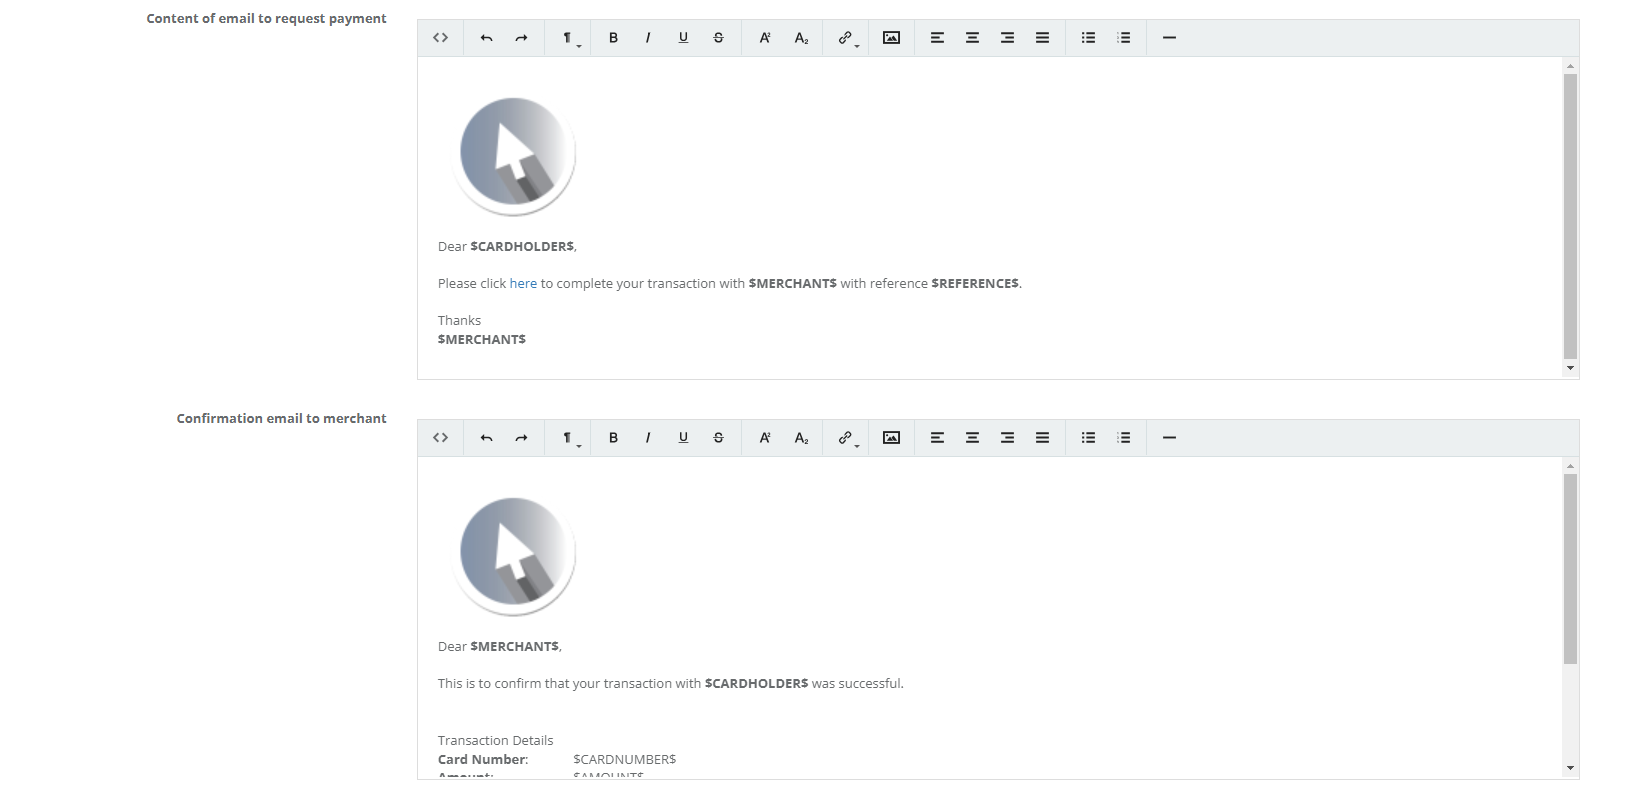
- Customise the message on payment request e-mail.
- Link Merchants Terms and Conditions
- Show Associated Logos
Action:
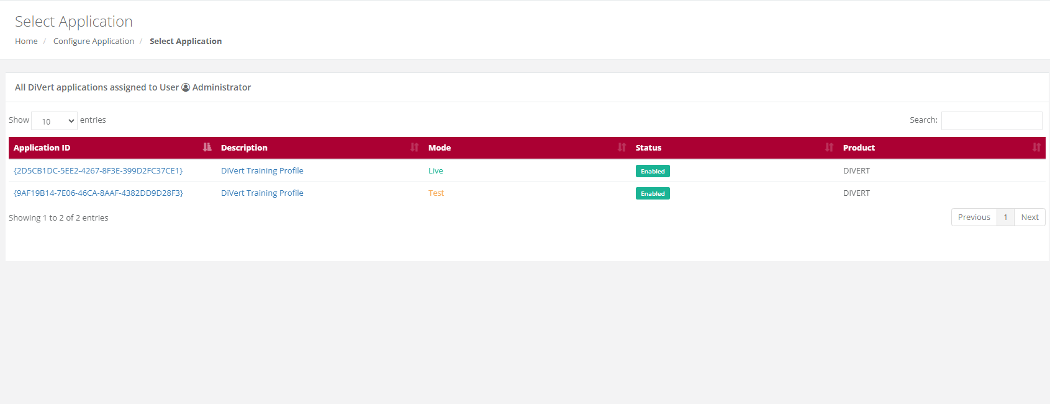
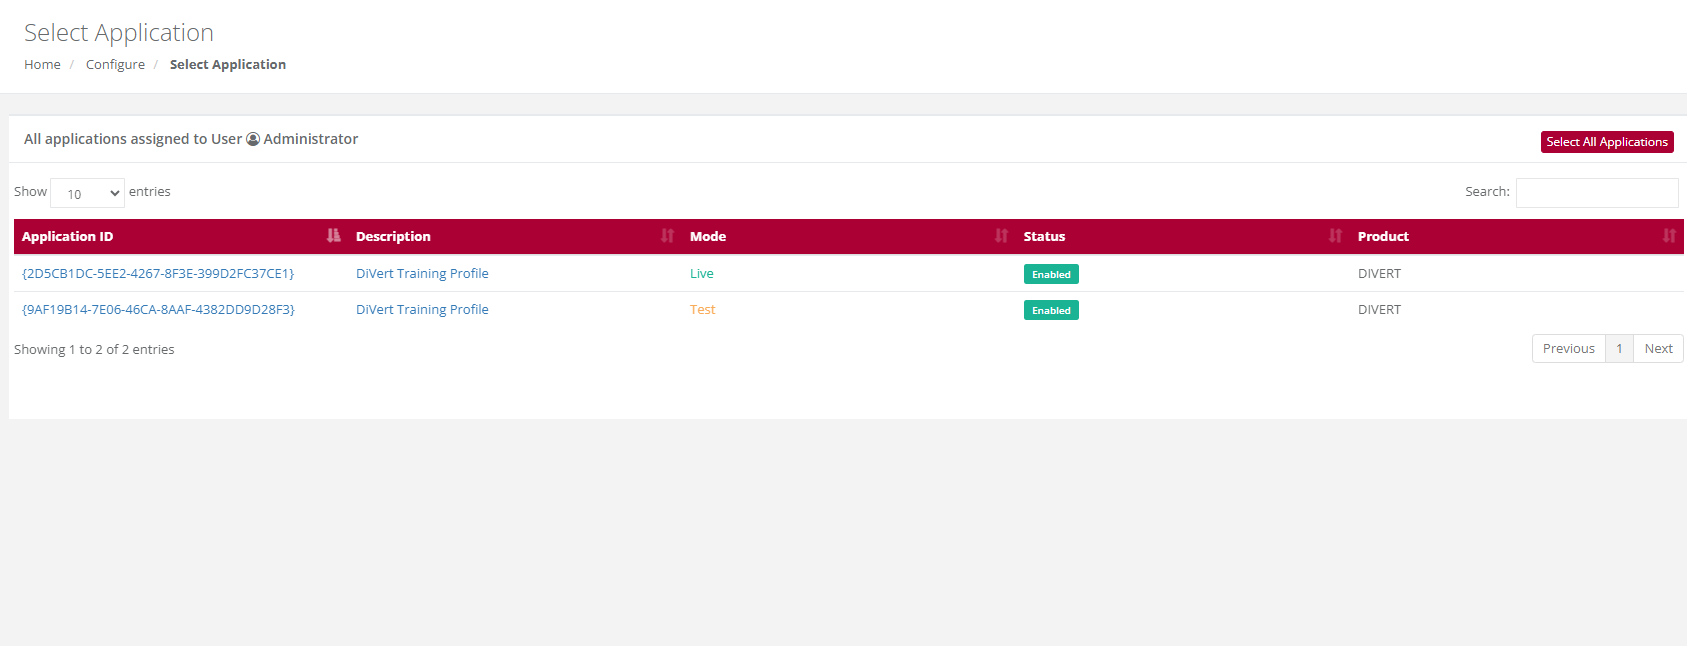
On the main menu go to DiVert – Configure Application.
Action:
Click on the Application you want to configure, i.e., either the Test or the Live.
To make the relevant changes, click on Save Changes.
Please note:
1. The Administrator can add specific user email addresses to receive confirmation emails when payments are made by the cardholders
• Select whether to send email confirmation “to user that created the request”. This will allow the user created by the Administrator to receive transaction confirmation emails Alternately, provide a different email address on the text field below
• Select whether to send email confirmation to Cardholder and capture the address to 'send from'
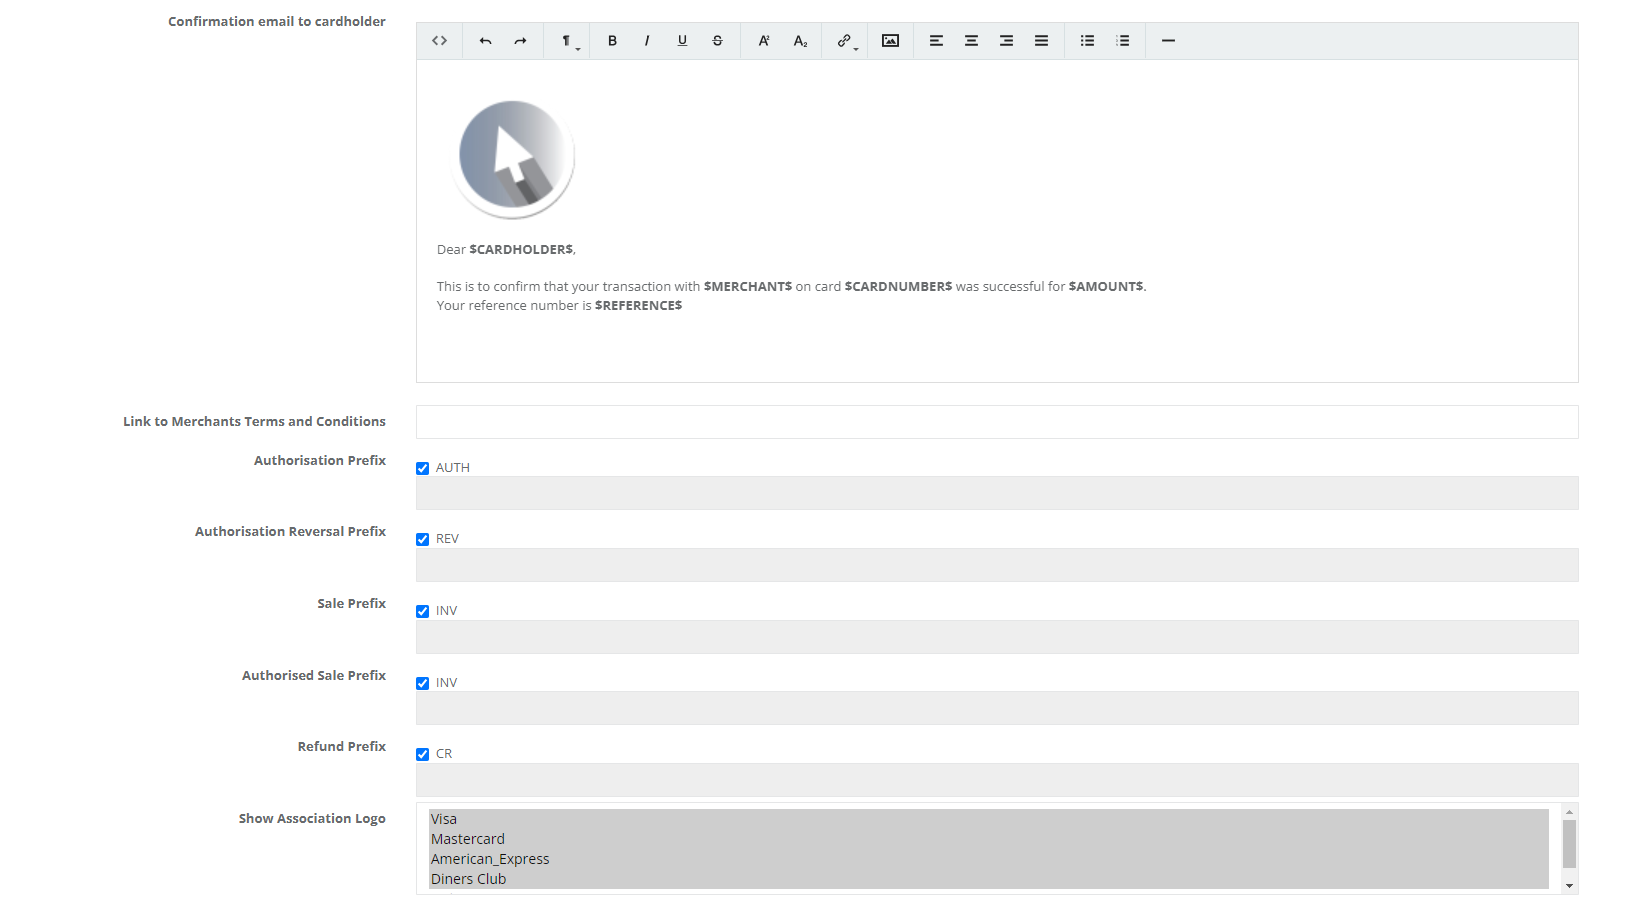
2. Customise payment request message to cardholder. DO NOT change content that is between $ signs.
Show Association Logo:
Here the administrator will select the applicable card association logos that will appear on the secure payment page. The card associations selected must reflect the card associations as per the merchant agreement.
Click on the card association. To select more than one association, proceed to hold in the 'CTRL' button on your keyboard, while making the selections.
Terms and Conditions
Configuration Purpose – Two show how a merchant can configure the terms and conditions. There are two ways in which this is possible - Free Text – Terms and Conditions Message or Merchant URL Link
There are two ways in which the merchant can configure how they would require their clients to accept terms and conditions. Where applicable, merchants must present their terms and conditions and must be accepted by the client before a payment is made on the payment page
URL Link – Terms and Conditions Message [Placeholder]
The below section allows the merchant to configure their website URL Link that holds the terms and conditions. When the merchants URL Link is configured, the terms and conditions can be viewed by the client on the payment page and must be accepted before submitting the payment.

NOTE: Once the client reads through the terms and conditions, they would be required to select a tick box on the payment page and acknowledge before completing a payment online.
Free Text – Terms and Conditions Message [Placeholder]
This section allows the merchant to configure their own terms and conditions according to the way they wish to present it to their client, this is a free text field that requires manual entry.
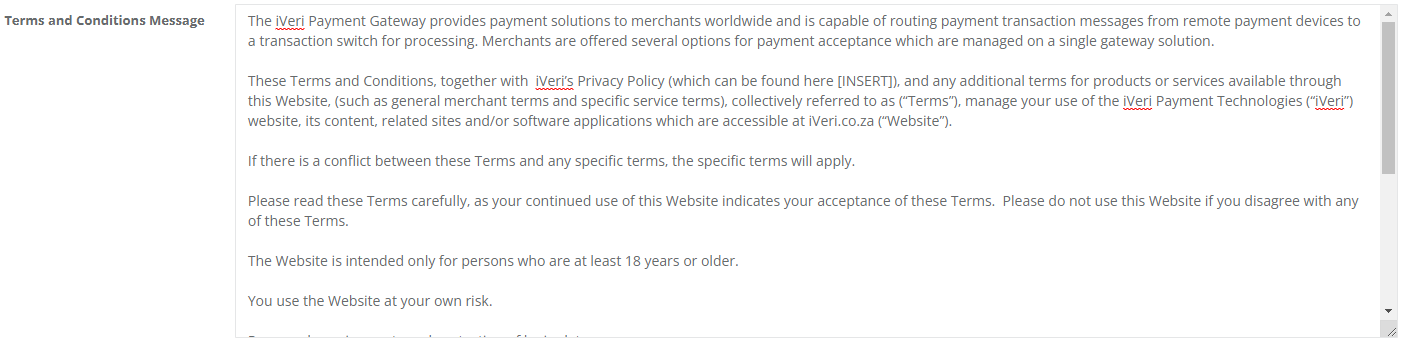
NOTE: Please do not use special characters. Once the client reads through the terms and conditions, they would be required to select a tick box on the payment page and acknowledge before completing a payment online
Payment Page example that includes Terms and Conditions
Below is where the client would need to click the text “terms and conditions” and read accordingly, then select the tick box to agree, then submit payment.

Configure Application parameter description:
NOTE: The above image for the configure application only reflects a portion of the complete list which you can select from
- The Administrator can add specific user email addresses to receive confirmation emails when payments are made by the cardholders
- Select whether to send email confirmation “to user that created the request”. This will allow the user created by the Administrator to receive transaction confirmation emails
- Alternately, provide a different email address on the text field below
- Select whether to send email confirmation to Cardholder and type in the address to send from
- Customise payment request message to cardholder. DO NOT change content that is between $ sign
- For merchants that have more than one payment method, they can select a preferred default Payment Method from the list– Visa Checkout, MasterPass or Card Payments
- Visa Checkout Merchant Take-On
- Merchants can also register for Visa Checkout in order to start accepting e-wallet payments from cardholders. To register merchants can mouse to the “Transaction Viewing Layout” section click on the “Reset Transaction Viewing layout dropdown, select “Visa Checkout Management” click the “Submit” button.
- A new page will be display and the merchant can be populating all the fields displayed on the below screen and submit.
NB: The merchant will also need to notify the Acquiring bank that they need to be enabled for Visa Checkout.
Please Note:
The merchant will also need to notify the Acquiring bank that they need to be enabled for Visa Checkout
Please Note:
The merchant can now be able to configure terms and conditions to be set and agreed by the cardholder upon making a payment. This is done by inserting a URL link where the merchants’ terms and conditions are found or type out the Terms and conditions.

Customize Transaction Form
Purpose - Customise the payment page that cardholder interacts with
Action:
On the main menu go to DiVert – Configure Application – Choose an application ID and then select Customize Transaction Form

Action:
Click on the Application ID you want to customize, i.e., either the Test or the Live. Make the relevant changes and click on Submit.
Please Note:
- Under Upload Logo, you can upload a company logo
- Under Style, you can amend the font colors, font, and background color.
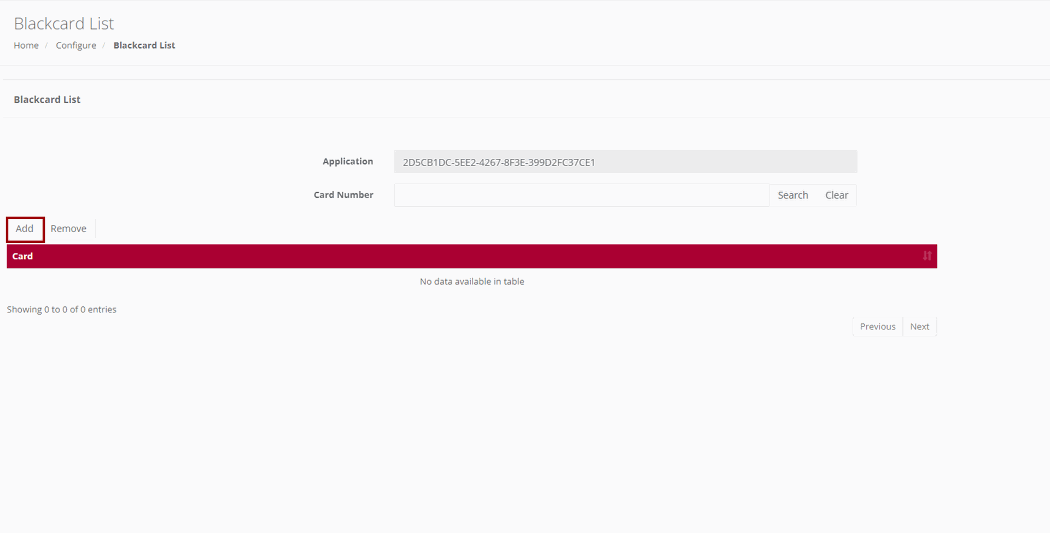
Black Card List
Purpose - This is used to create a list of credit card numbers that you do not want to accept. The iVeri gateway will always check your list before sending the transaction to the bank for processing. If the card number is on your list, the transaction will be rejected immediately. The reasons for putting card numbers into this list are at the discretion of each individual merchant and will only be rejected by your business.
Action:
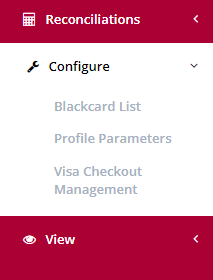
Click on Configure, Black card List. This will bring up the following screen
Action:
If you have more than one Application ID and want to capture the card number to be blocked for all your applications, click on Go next to All Applications at the top. If not, then click on the Application ID in the bottom section and the next page will be displayed.
Action:
Capture the credit card number you want to add to your Black Card List and click on Add. This will put the card number into your list. If you have more than one number to add, put in the next number and click on Add again. To save your entries, click on Submit.
You can also search for a number by typing it in and clicking on Search to see if a card that is being rejected is on your list. If the number is on your list, it will be highlighted. To remove a number from your list, enter the number, click on Search and when it is highlighted, click on Remove and then click on Submit to save your change (removal)
Reconciliation
Print Report
Purpose - To View / Print / Save reconciliation files for a specific acquirer cycle / settlement period in the following file formats:
PDF
XLS
CSV
Action:
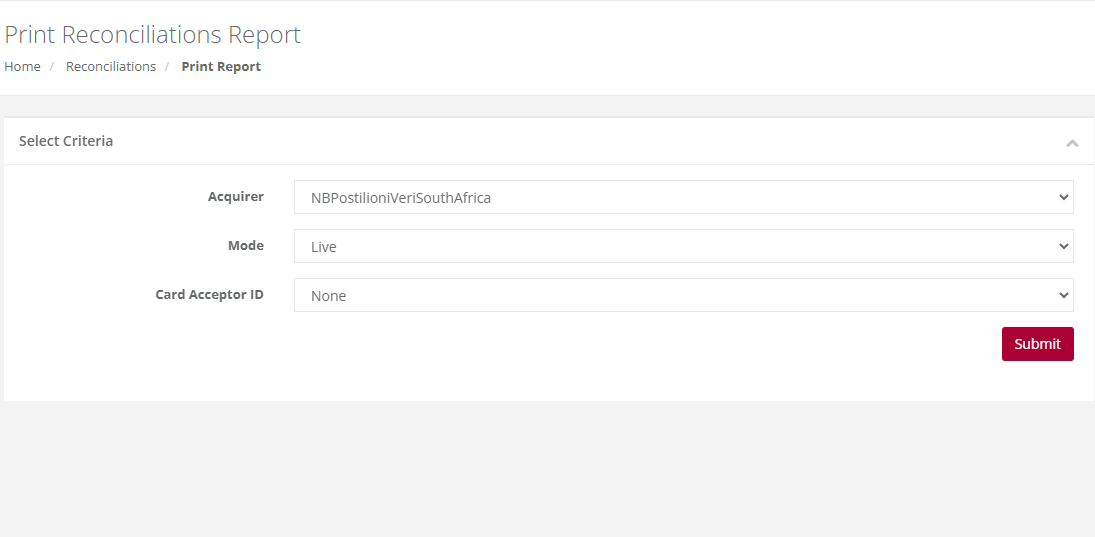
Navigate to the menu and select ‘Reconciliation’. From the drop-down menu, select ‘Print Report’.

Action:
If you have only one Merchant Card Acceptor ID, simply click on Submit. If you however have more than one, then click on the drop down and select the Card Acceptor ID for which you want the report before you click on Submit.
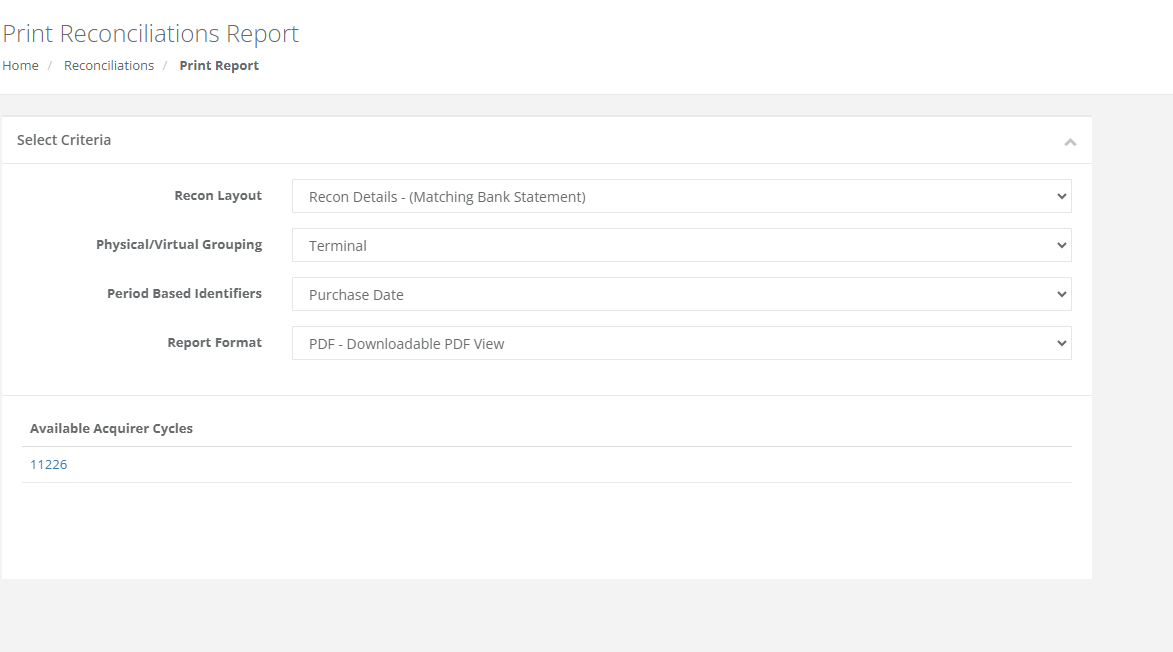
The following screens and points highlight the various parameters that need to be selected before viewing the report.
Action:
Select the required Output format – either PDF or XLS. Find the acquirer cycle number you want to view and click on the actual cycle number. You can now choose to either Save the report or to open it in a new
Please Note:
If your file contains more than 10000 records, then the time in the message above will show 20 minutes. It is recommended that you click on the words Click Here and you will receive an email when your file is ready for retrieval.
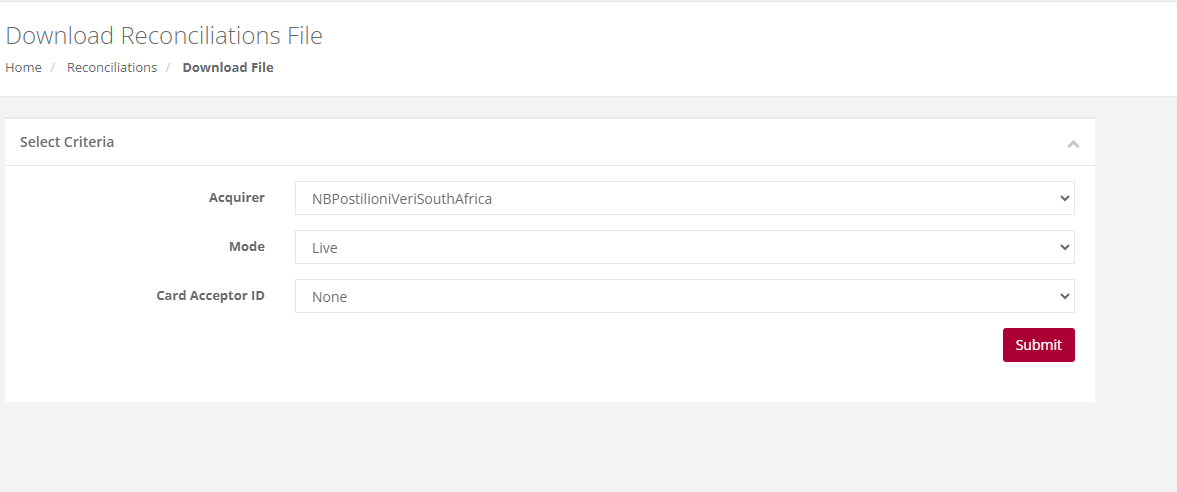
Download Reconciliation - Download File
Purpose - To download and save the selected reconciliation file in XML format.
Action:
Navigate to the menu and select ‘Reconciliation’. From the drop down menu, select ‘Download File’.
Action:
If you have only one merchant Card Acceptor ID, simply click on Submit. If you however have more than one, then click on the drop down and select the Card Acceptor ID number for which you want the report before you click on Submit. Select the cycle you wish to view.
Please Note:
If your file contains more than 10000 records, then the time in the message above will show 20 minutes. It is recommended that you click on the words Click Here and you will receive an email when your file is ready for retrieval.
Profile Parameters
Purpose - To set the Security Parameters for all users in terms of their passwords, validity, suspension, and login notifications. These parameters can only be set by the Back Office Administrator.
Action:
From the main menu, the user will navigate to: Configure - Profile Parameters.
Action:
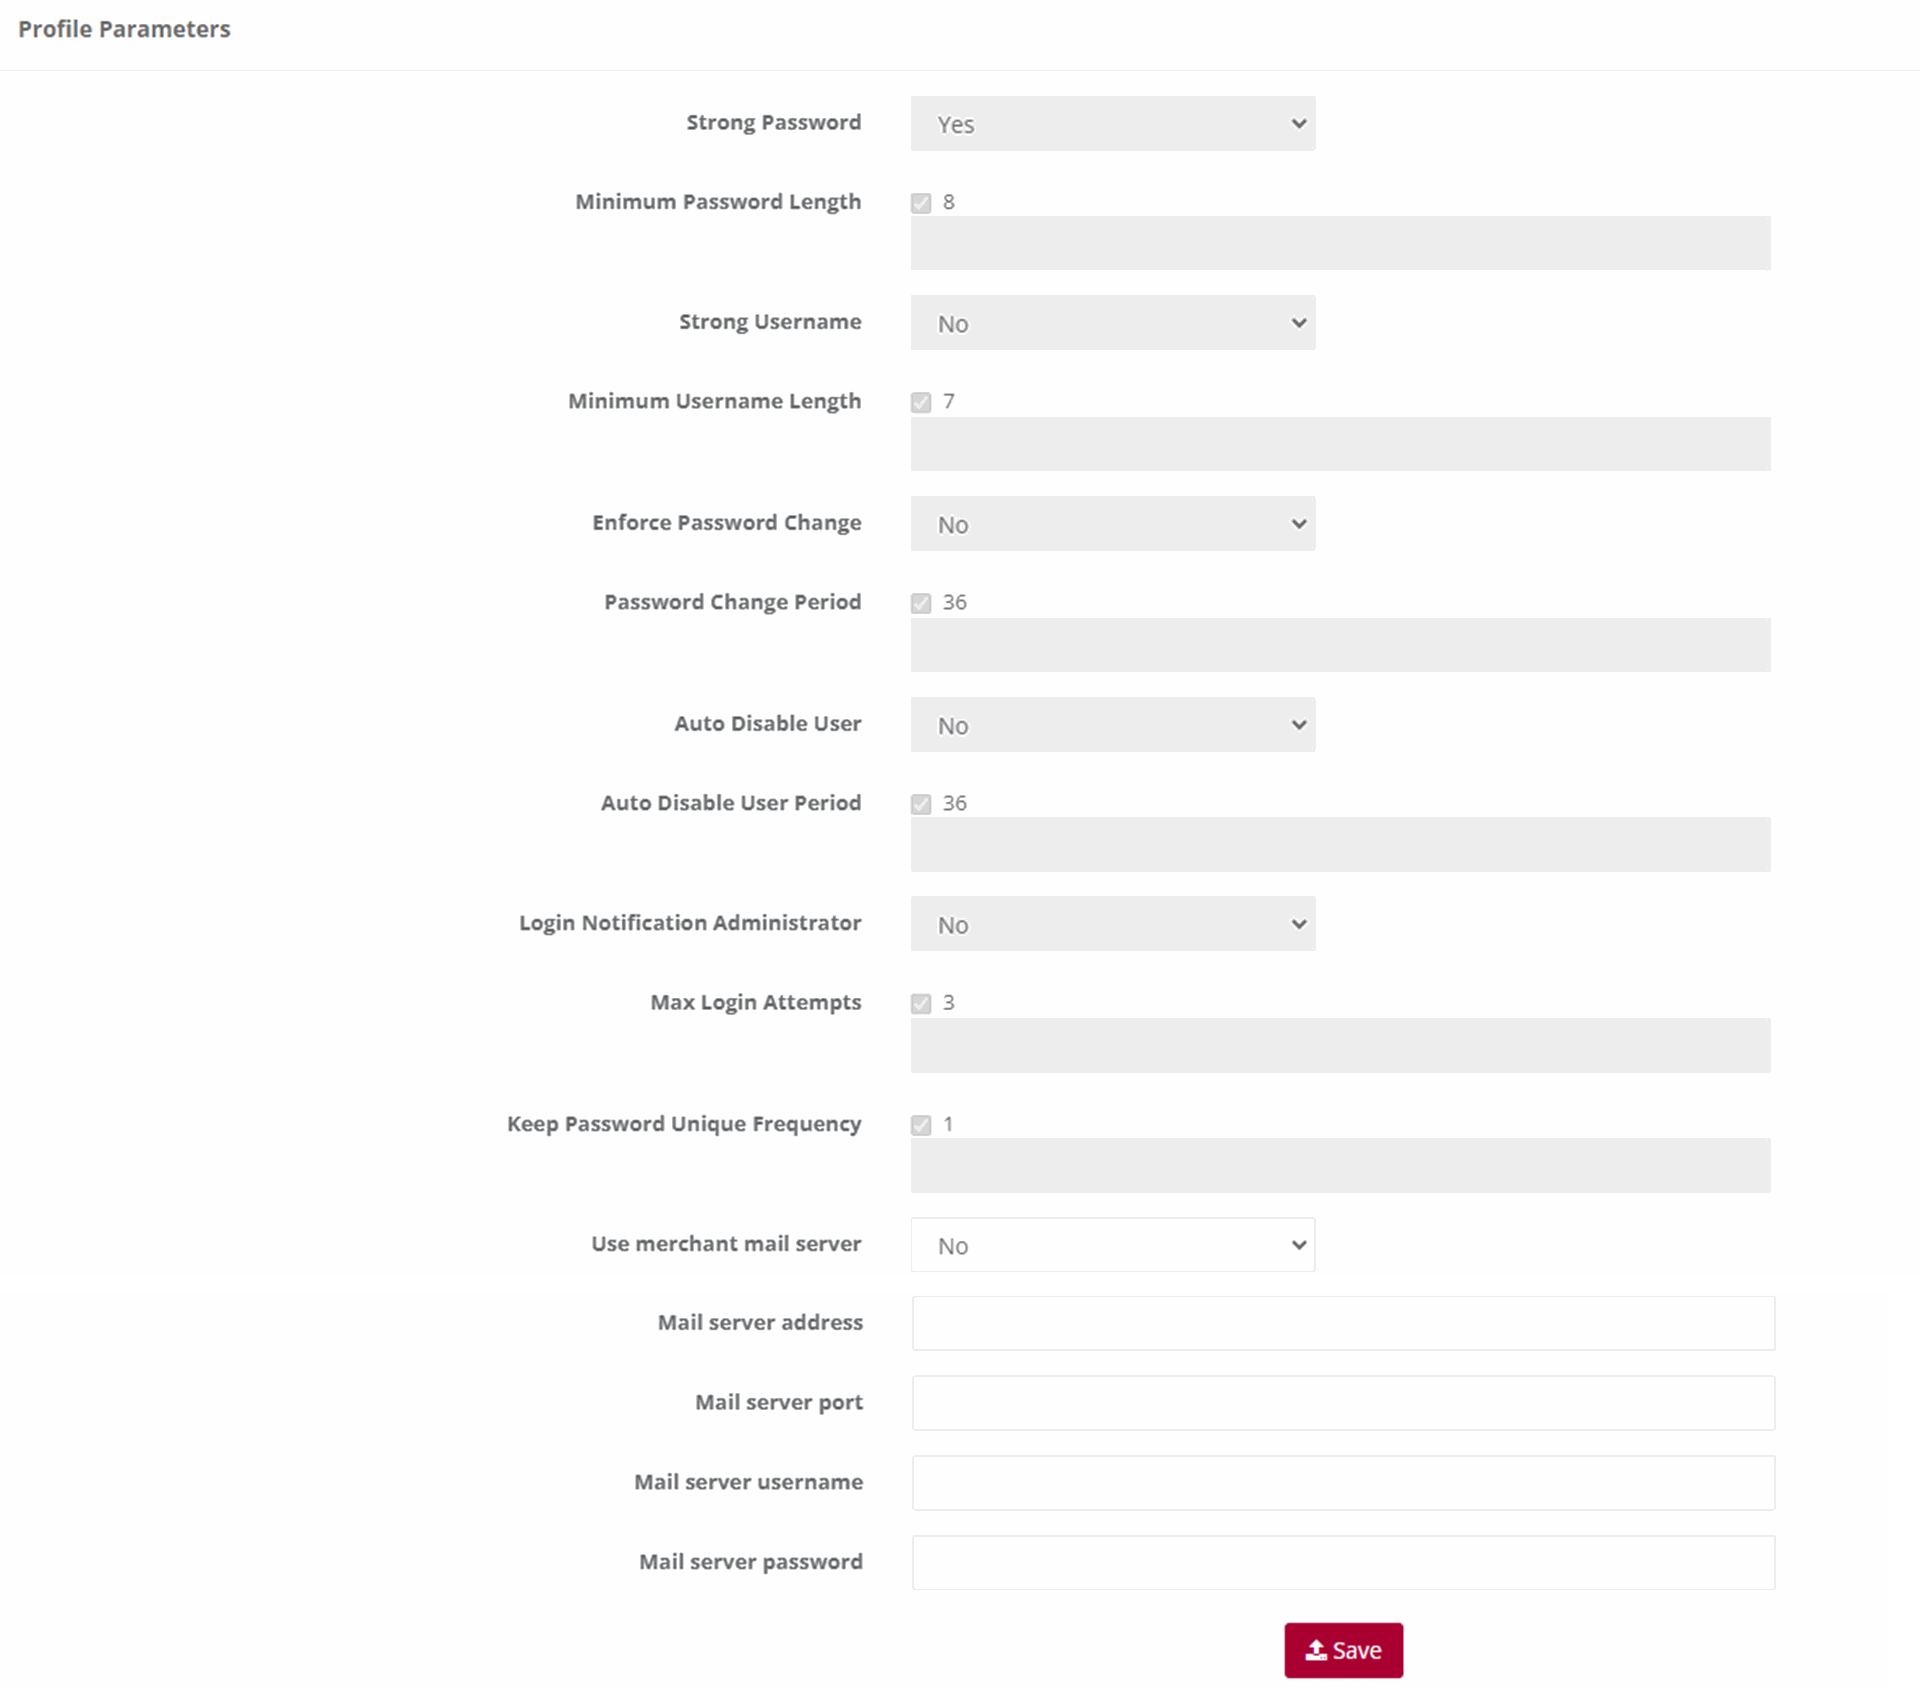
This will display a form where you can modify the system defaults to meet your specific needs. Please note that any changes made to these defaults will apply to all users with access to iVeri BackOffice.
Note:
- Strong Password: The default is No. This means that the password can be anything if it is not less than the default minimum length. If you change the default to Yes, then the user’s password must be a combination of alpha/numeric and special characters also not less than the default minimum length.
- Minimum Password Length: The default is 6. You can change it to any higher number. If you do then this number will apply to ALL users.
- Strong Username: The default is No. This means that the username can be anything if it is not less than the default minimum length. If you change the default to Yes, then the username must be a combination of alpha/numeric and special characters also not less than the default minimum length.
- Minimum Username Length: The default is 4. You can change it to any higher number. If you do then this number will apply to ALL users.
- Enforce Password Change: The default is No. This means that users will never be forced to change their passwords. If you change the default to Yes, then all users will have to change their passwords in accordance with the Password Change Frequency that you set next.
- Password Change Frequency (days): The default is 60 days. This default is only valid if you change the Enforce Password Change default to Yes. If you do this then you can also change this number of days default to a longer period.
- Auto Suspend Users: This is used to automatically suspend a user from accessing Back Office after a set period. The default is No. If you want to suspend ALL, the users after a certain period of time then change the default to Yes.
- Auto Suspend After Period (days): The default is 60 days. This default is only valid if you change the Auto Suspend Users default to Yes. If you do this then you can also change this number of days default to a longer period.
- Login Notification to Administrator: This is used if the Administrator wants to know every time a user logs in to Back Office. The default is No. Simply change this to Yes and the Administrator will be notified by email every time a user logs in to Back Office.
- Keep Password Unique: This is used to set the period after which a user can use the same password again. The default is One Time. What this means is that when a user’s password expires after the default period of 60 days or the new period set by the Administrator, the user will have to enter a new password in accordance with the relevant settings above. They can then use their original password again after this period has expired. If you want the period longer before a previous password can be used again, select one from the drop down If you select Always, then the user will have to choose a new password every time their password expires.
- After changing any of the default settings above, click on Save to effect your changes. The Administrator can change any of the above at any time.
View
Transaction Lookup
Purpose - To lookup the details of a single transaction based on specific search criteria.
Action:
Click on View then Transaction Lookup

Action:
Click on the Application ID on which you want to do the lookup e.g., Live or Test

Action:
Select the Date on which the transaction took place by changing the default date or by clicking on the calendar icon next to the date. If you are not 100% sure of the date, you are able to search in a range of up to + or – 2 days of the date you have selected by changing the 0 default to 1 or 2 in the +/- Days drop down next to the date.
You then need to enter either the Transaction Index or the Merchant Reference number. If you do not have either of these numbers you are able to enter either the full credit card number or a partial (first four numbers …….. last four numbers) AND the amount. Click on search.

The result/s (summary) will be displayed on screen. Click on the summary of the transaction to obtain all the details pertaining to the selected transaction.
Transaction History
Purpose -To obtain a list of transactions for a selected calendar period reflecting all the result details for each in XML format.
Action:
Click on View then Transaction History

Action:
To view Transaction history, .click on the appropriate Application ID, Live or Test
Action:
Make your selection of period/time in the above form by manually changing the default dates or using the calendar icons next to each date. Also select file format i.e. XML or CSV. Once done click on Download. Your file will be open or downloaded to selected folder

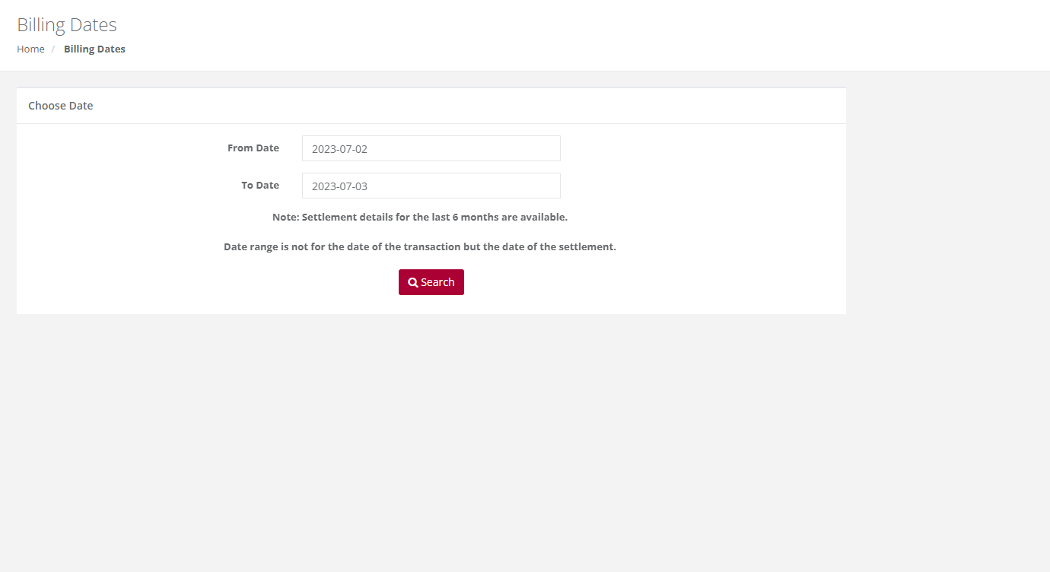
Billing
Purpose - This feature shows the Billing that is in place for this merchants’ transactions. The list of transaction and what is being charged to the merchant, this will appear here.
Note: the plus sign provides details as to how this amount is calculated.
Action:
Click on Billing

Action:
Choose a date to search for transactions processed at a certain period.

Transaction will appear


Settlement
Purpose - This detail information provides the merchant the view based on what they will be settled on based on processed transactions. It also provides a breakdown on what could have been retained by the acquiring bank and what is due to them as the merchant. iVeri will then settle the merchant once the acquirer settles the funds to iVeri.
Action:
After the user clicks on settlement, select the date range for the settled transaction. (The image attached should follow on from the image where the user clicks on the ‘settlement’ tab).

Visa Checkout
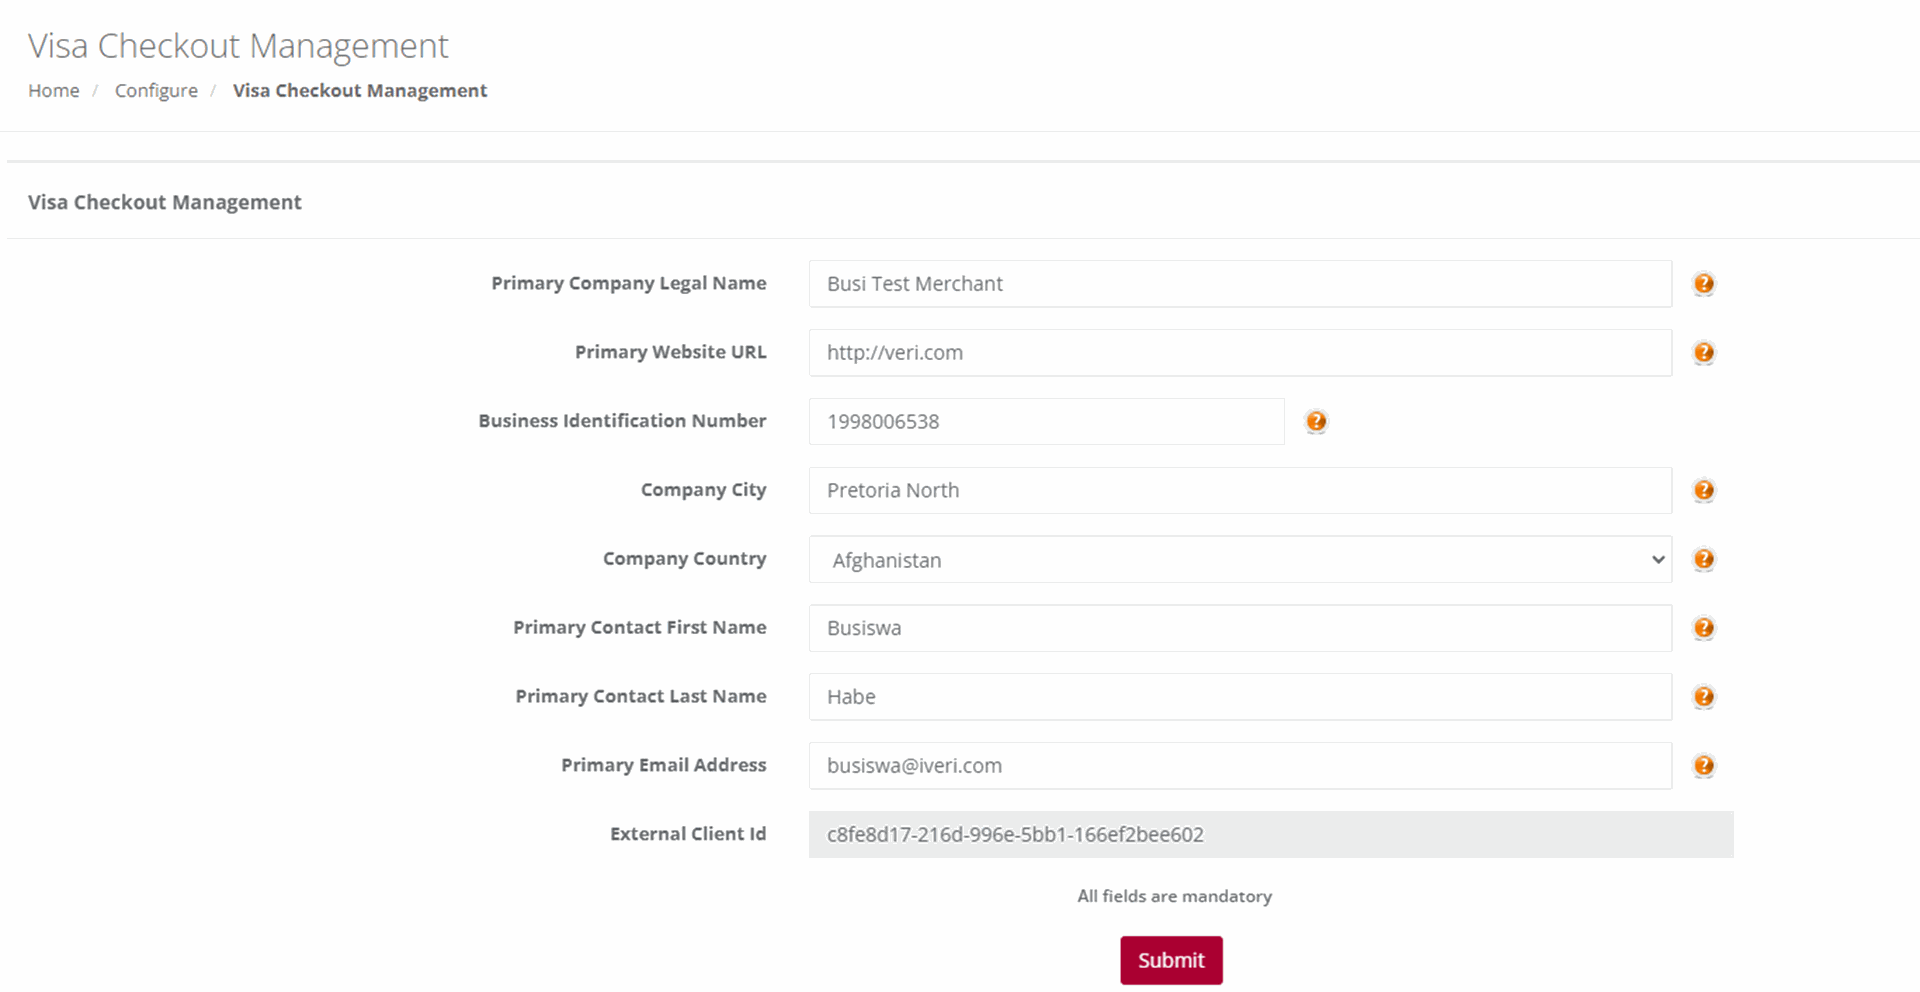
Visa Checkout Merchant Take-On
Merchants can also register for Visa Checkout to start accepting e-wallet payments from cardholders. To register merchants can mouse to the “Transaction Viewing Layout” section click on the “Reset Transaction Viewing layout dropdown, select “Visa Checkout Management” click the “Submit” button. A new page will be display and the merchant can be populating all the fields displayed on the below screen and Submit.
NB: The merchant will also need to notify the Acquiring bank that they need to be enabled for Visa Checkout.


Welcome Page
Purpose - The 'Active Session' tab reflects who is logged in and provides the menu options which the logged in user is able to access or use.