BackOffice Services
Application Identifiers:
There are 2 application modes: Live and Test.
To ensure updates and changes are configured for a merchant’s application, select the LIVE application.
BackOffice Services:
How to navigate to the BackOffice Services screen:
Applications > Update > BackOffice Services
1. This is where BackOffice Services are created for the merchant. This is a mandatory step that would need to be updated in order to activate an application for a Merchant.
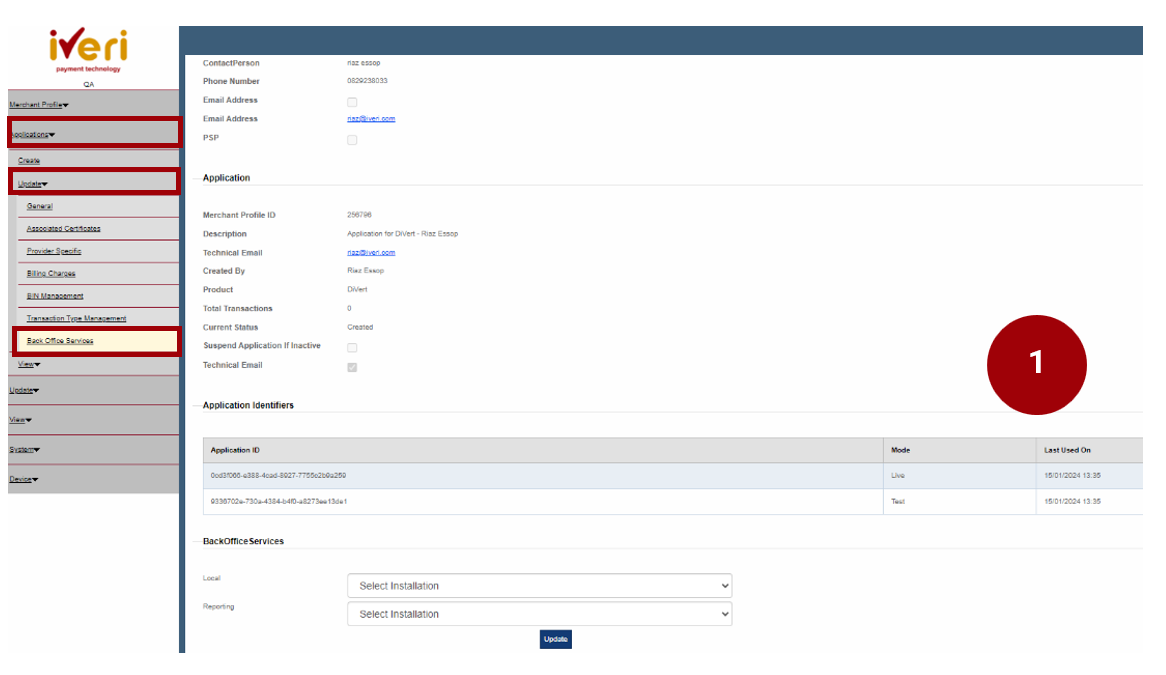
2. Under BackOffice Services, under ‘Local’, click on the dropdown and navigate your way to ‘FNB Back Office’.
This update will provide the Merchant access to BackOffice.
Once the user has captured the details under Local, click on the ‘Update’ tab.
This following screen will now appear.

3. Under the ‘Update BackOffice’ tab, the user would need click on the ‘FNB Back Office’ tab.
Note: The purpose of this update is to sync the new merchant application that you have created to iVeri BackOffice.

Additional BackOffice services configurations:
Users may be required to configure additional BackOffice Services for a Merchant. The Delta is dependent on the solution the merchant has agreed upon.
‘Enterprise’ configuration is an essential component for Enterprise setup within iVeri's eCommerce solution. The ‘Enterprise’ configuration under BackOffice Services only applies when the merchant is processing via an integrator or payment service provider. If this is not the case, this configuration should be left unchanged.
4. This Merchant page will appear. Click on ‘Update’ to synch the new application to BackOffice for this Merchant.

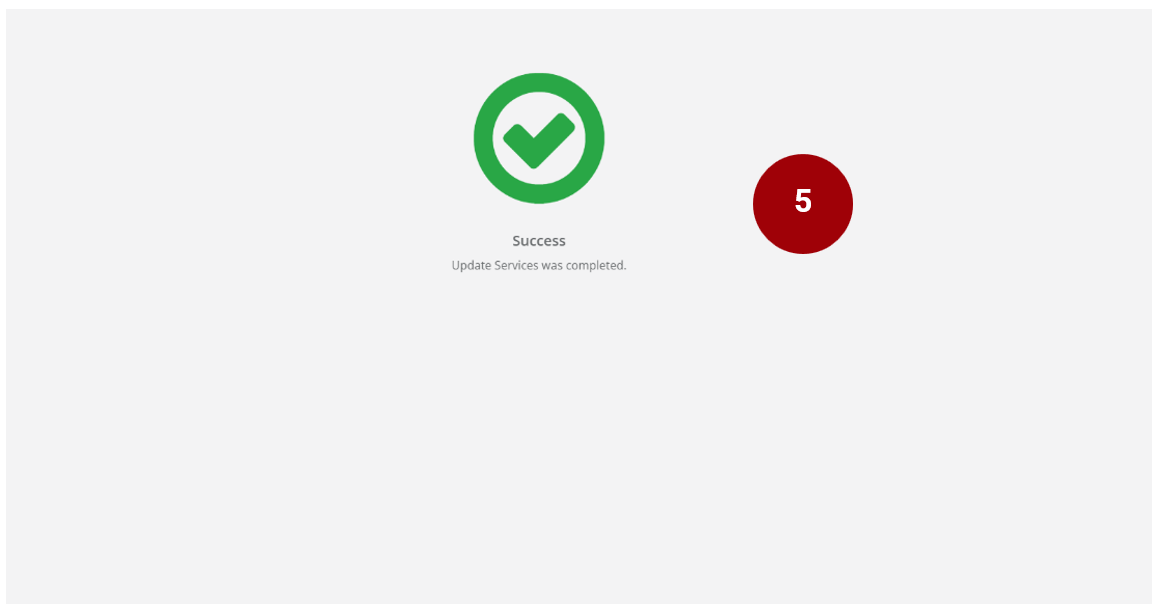
5. The following screen will appear confirming the successful update.
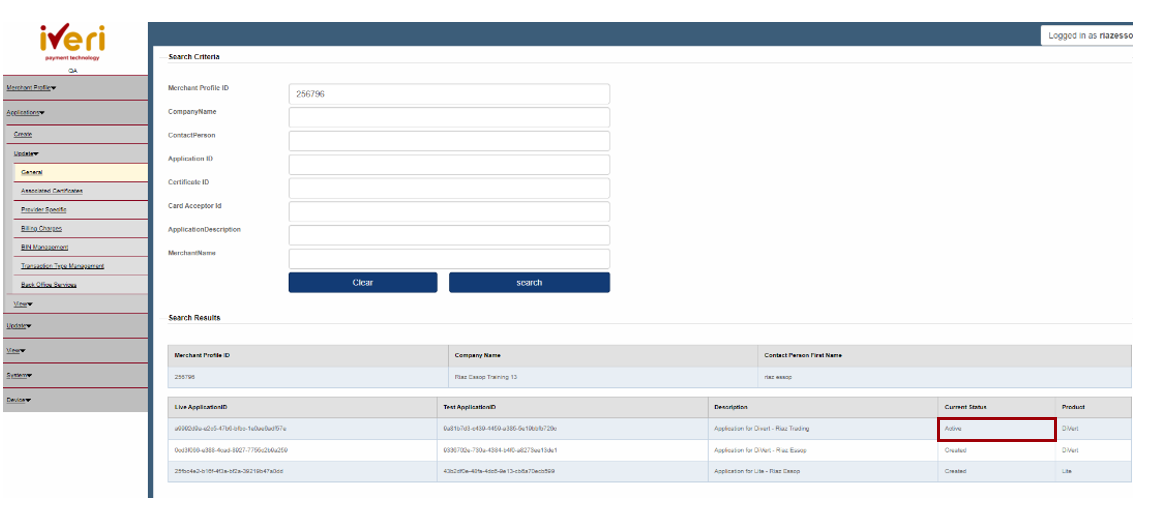
Setting Application Status to Active
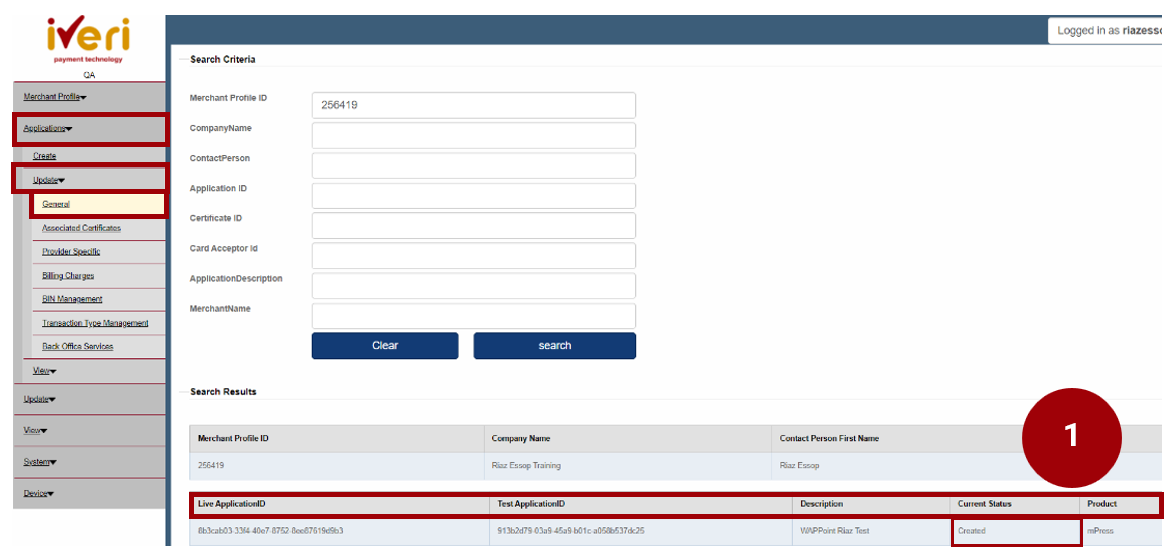
How to Navigate to this Screen:
Applications > Update > General
The current Merchant application that you have created will be defaulted to ‘Created’ status.
The user would need to change and update the status from ‘Create’ to ‘Active’. Setting the application to ‘Active’ is a crucial step in the onboarding process, as it will allow the Merchant the ability to trade.
1. Click on the ‘Live’ Application ID.
The following screen will appear.
2. Navigate your way to ‘Current Status’ and from the dropdown select ‘Active’.
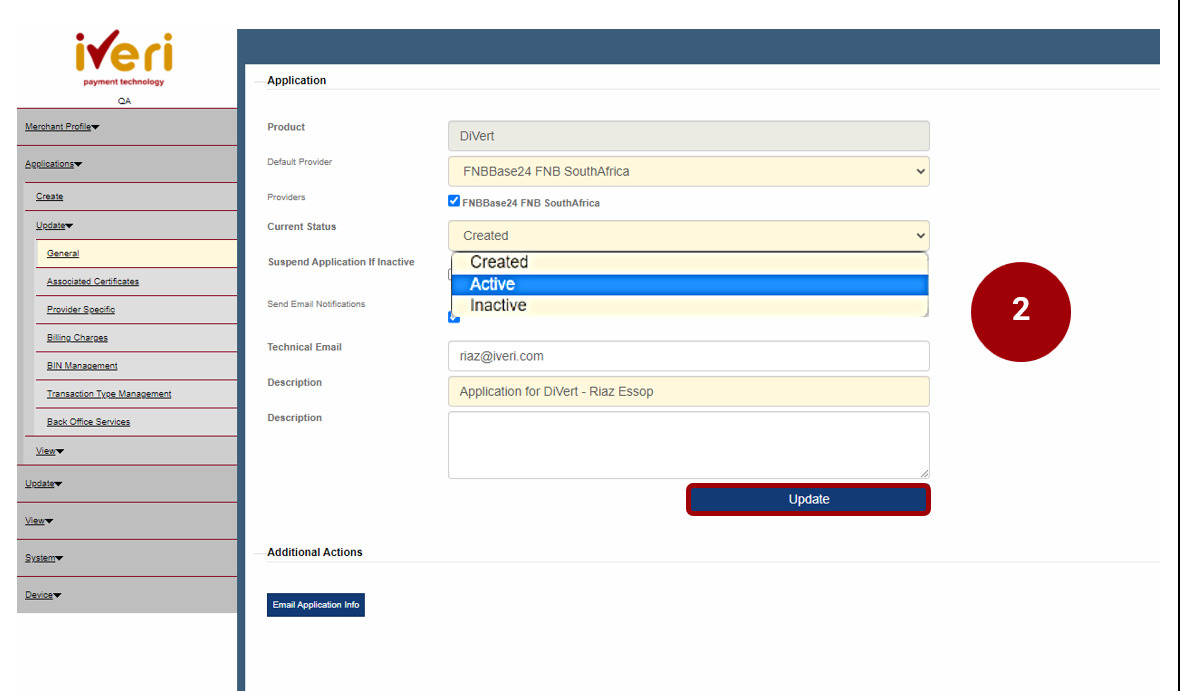
Once you have made the selection, click on ‘Update’.

The below successful message will then appear on the top of the same screen confirming that the Update was successful:

3. The application status has now been changed to ‘Active’.
4. This is a sample of the confirmation e-mail the Merchant will receive confirming that their application has been successfully updated.
