Enabling MauCAS on the Administration Website
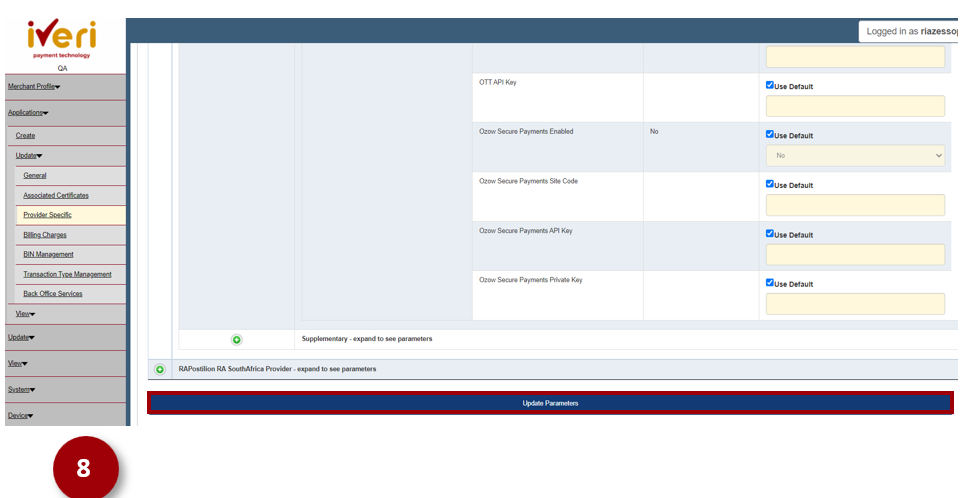
Below we will look at the step-by-step process of enabling a merchant for MauCAS via the Administration Website.
Navigation Path:
To navigate to this screen,
Select Applications > Update > Provider Specific.
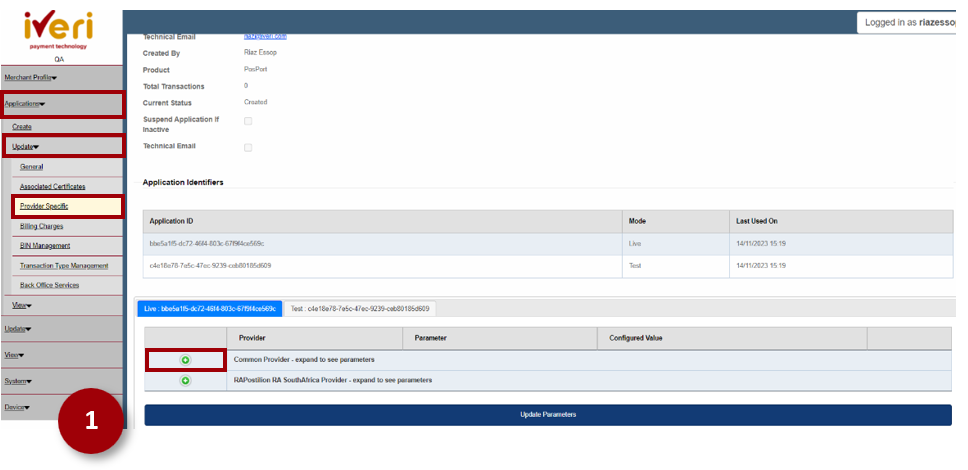
1. Click on the ‘Common Provider’ expansion tab.
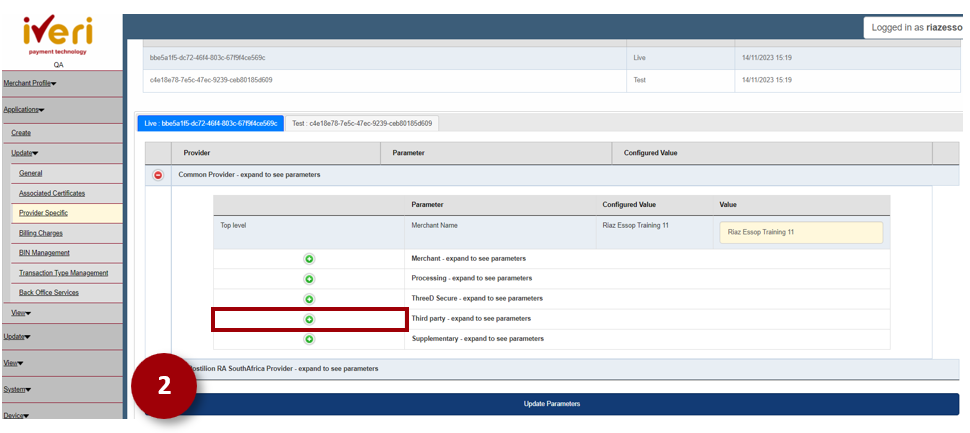
2. Navigate to the ‘Third Party’ parameter and click on the expansion tab.
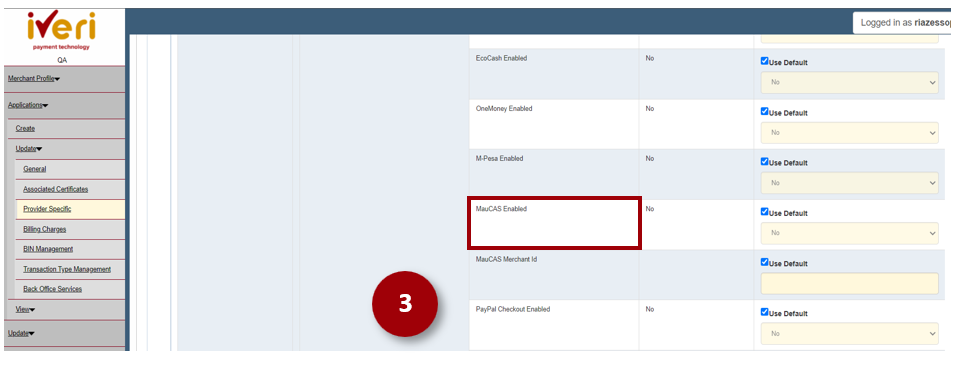
3. Navigate to the ‘MauCAS enabled’ parameter. This parameter defaults to ‘No’.
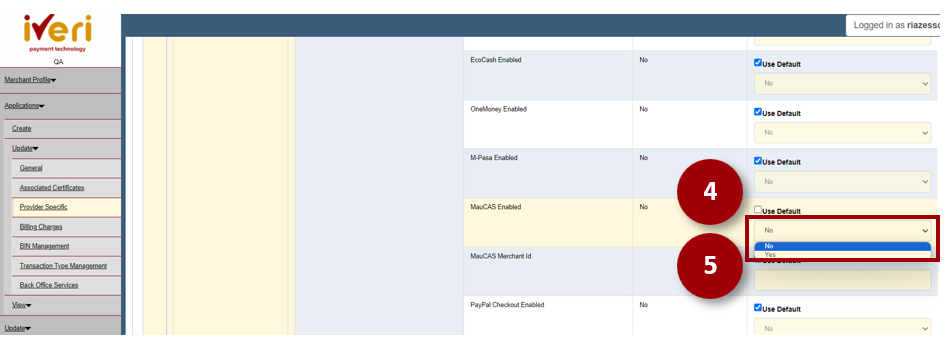
4. To enable MauCAS, untick the default value.
5. From the dropdown, select ‘Yes’.
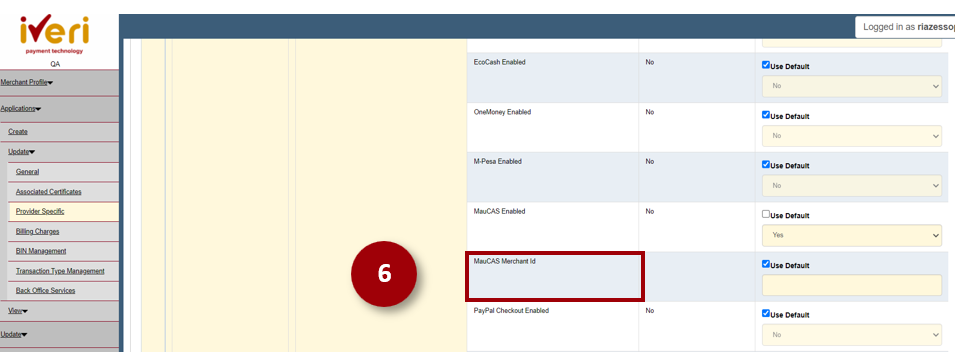
6. The next parameter that needs to be populated is the ‘MauCAS Merchant ID’. This parameter needs to be populated with the Merchant ID.
The Merchant ID is provided / supplied by the Acquirer.
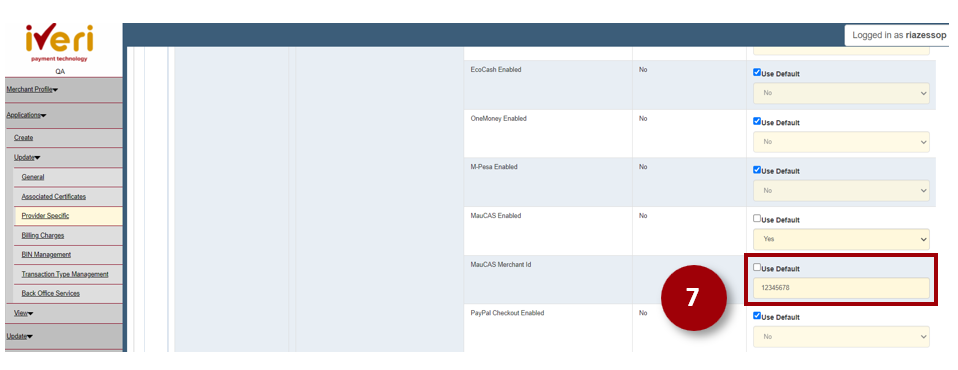
7. Untick the default value and enter the MauCAS Merchant ID.
8. Lastly, save the changes that you have captured by ‘Updating Parameters’..
